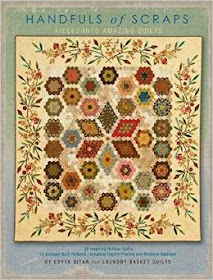
Confession: Late in 2014 I started yet another hand sewing project. At the time I was having such fun making the English paper pieced (EPP) hexagons for my Red Hot Dreamy Hexagons quilt top (which by the way is finished and just waiting to be quilted!) that I immediately started making more when I saw this book cover...
I'm using primarily Kaffe Fassett and Anna Maria Horner fabrics to make my star and flowers and a wide variety of light-to-medium grey prints for the background hexagons. The center star of the quilt top is almost complete!
The pattern calls for 759 colored hexagons (to make the star center and surrounding flower blocks) and 532 background hexagons! Wow - that is a LOT of hand-sewing!! I haven't yet made a count of how many are completed because I don't want to discourage myself, but I plan to show you my (slow) progress on this throughout the year.
The great news is that this project is perfectly portable - I've worked on these hexagons while traveling in Florida, Indiana, Texas, and Ohio and in front of the TV many evenings. You only need to bring along a small bag of precut templates, precut fabric squares, needle, thread, small scissors, and reading glasses while you're on the go :)
I use a 1" Fiskars hexagon punch to cut my EPP papers. I am way too cheap to buy enough EPP papers for a project of this size, so I cut my papers from the subscription inserts found in magazines. FREE EPP papers, people! Using a hole punch tool to make a hole in the center of each paper makes them easy to remove later.
A few of my fabrics were cut using a 1.25" hexagon die and my new Sizzix Fabi Cutter, but I found that they were a little too small to easily wrap around the papers, so I've gone back to my original method of using 2.5" fabric squares for 1" hexagons. (The 1" measurement indicates the length of each side of the hexagon.) There is a 1.5" hexagon die available for the Sizzix Fabi, but I'm too cheap to buy another die when 2.5" squares work just fine :)
As you can see, there is not a lot of seam allowance on the back side of these EPP hexagons - too fiddly for me. The method I use for thread basting my hexagons is actually a mash-up of several methods, but this YouTube video is the closest demonstration I can find online to show you how I do it. I don't glue baste my hexagons - I tried that method but it just didn't work for me. Thread basting takes longer, but thread is cheaper than glue and it stays in place just fine.
Along with the star center I've completed four of the 32 flower units...
This photo shows the back of the center star unit. You can see that I've removed the papers from all of the hexagons that are surrounded by others. The perimeter hexagons still have their papers enclosed; I don't remove the paper until a hexagon has been sewn to another on all six sides. You can also see that the green and black hexagons do not have any thread basting. These are the ones I tried to glue baste, but the seam allowances didn't remain glued down long enough for me to sew them all together, so I ended up re-gluing all of them. What a waste of time!
And here are the back sides of my flower units. I'll leave all the basting stitches in even after the whole top is put together. There really is no reason to spend the time removing all those stitches - they'll just be concealed on the back side against the batting and won't interfere with the quilting process.
And one last shot of the center...
This is going to be a very lengthy project. I hesitate to even venture a guess at a completion date, so for now I'll just plan to write an update periodically and maybe at some point provide a count of how many of the 1,291 hexagons are completed. But that would require counting. And I'd rather just spend the time sewing :)


Looking so great, Shelley! I picked mine up the other day and was amazed to find I only have a handful of flowers left to make! If only I could remember where I put all my background hexies I diligently cut out before Quiltcon....
ReplyDeleteOh wowsers! This will be stunning!! Well....it already is!
Delete