Another auction item for donation! This one is for my SIL, Lisa, who is the principal of a Lutheran K-8 school. Every spring the school (which includes all grades from K-12) hosts a big dinner and auction to help support school functions and student programs.
If you are a long time reader, you may recognize this quilt top from this post over two years ago! It's been safely tucked away, waiting to be quilted and finished so that a new baby or young child can enjoy it.
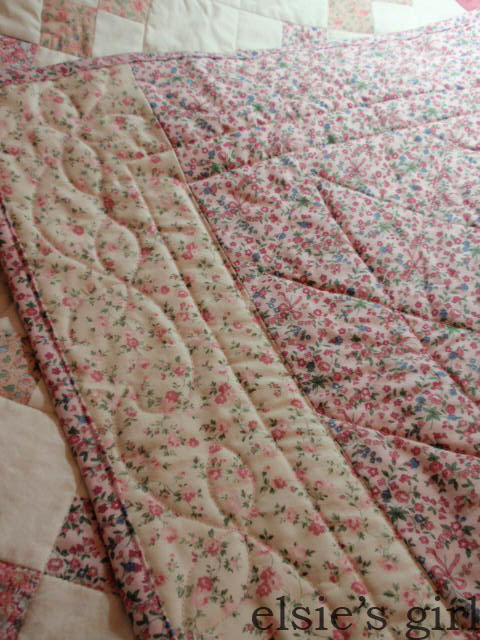
The pinwheel center is quilted with a meandering large stipple pattern, while the inner border has some lazy intersecting curves.
On the outer borders I tried something different and quilted the cursive lower case alphabet - it seemed appropriate since the border was already filled with letters!
I wanted the quilt to feel somewhat personalized even though I don't know where it's new home will be, so I used one of my favorite quotes on the label. I don't know who said it, but it always makes me smile when I read it.
The backing is more letters - lots and lots of letters on this quilt! And a machine-sewn binding for durability.
I didn't make a resolution for this to be a year of sewing finishes, but it feels pretty good to have two things done right out of the gate :)
Showing posts with label machine binding. Show all posts
Thursday, January 24, 2013
Tuesday, January 8, 2013
Happy 2013!
I'm a little late to the party wishing you all a Happy New Year, but better late than never, right?!
I managed to squeak out a few finishes at the very end of 2012 - and I do mean the very end. As in December 31!
This Sunburst Baby quilt had been quilted with an all-over stipple pattern...
And the binding was machine-attached in mid-December...
But the label wasn't attached until New Year's Eve. It's now been delivered to the family, and hopefully they are enjoying it :)
This sweet pink and yellow jelly-roll baby quilt is headed to a local hospital NICU unit with lots of other baby quilts made by my sewing group at church.
Love that sweet polka dot binding...
And last but not least, true to my usual habit of finishing a holiday project within days of the holiday, my little button tree was framed just long enough to sit on the hearth for a photo. It's now packed away, and I'll likely forget about it until late November this year when we haul all the decorations up again. I'll open the box, unwrap it, and say something like, "oh how lovely! I'm so glad I finished it!"
I'd like to say that I resolve to finish more of what I start this year, but that's just not me. I do resolve to finish items with a deadline first, but then I'm just going to work on whatever makes me happy at the moment, and if it gets finished, great! But the whole point should be to have fun, shouldn't it?
Here's to a healthy, happy, and FUN 2013!!
Labels:
baby quilt,
Christmas,
holiday,
jelly roll,
machine binding
Thursday, October 4, 2012
fall placemats
This work-in-progress can finally be checked off the list, and there's still plenty of fall left to enjoy them :)
Last fall Thing 2 decided we needed some season appropriate placemats, and since she was fresh off of her table runner finish (see it here) she decided to use the same pattern for our placemats.
Luckily I had a bundle of autumn-hued Anthology fat quarters just waiting to be cut up and used. We dug through the stash and found a few others to coordinate, and she went to town cutting 3" x 18.5" strips - enough to make four placemats. She finished two of them last year, and then schoolwork and life in general got busy and the other two were just put aside.
Time flies and here it is fall again already! I discovered the unfinished pile a couple of weeks ago while on a straightening and organizing binge, and decided that we needed six rather than just four (I hate when you've got a guest or two and all the placemats don't match or even remotely coordinate. OCD? Yes!)
So a few more strips cut and sewn, some simple straight-line quilting, and now we've got a coordinated set of six fall placemats :) You can see that the strips were just sewn together randomly to avoid a matchy-matchy look.
They are backed with this large fall floral Anthology print.
And since they will see lots of time in the wash cycle, the binding is machine-stitched for extra durability. In an uncharacteristic burst of "use what you already have on hand and just finish it already" motivation, two different bindings were used!
You can look here to see my method for machine binding.
Finished measurement: 11.5" height x 18" width. Very simple and quick!
Monday, January 16, 2012
machine binding explained
Several times on this blog I have talked about attaching quilt binding entirely by machine. Last week I finished another quilt binding like this and actually took some photos to show you how I do it.
Disclaimer here: this method is nothing revolutionary (and I didn't invent it); it's just a mixture of different techniques that I've read about or seen demonstrated, and the method that works best for me :)
I always cut my binding strips at 2.25", and sew them to the front of the quilt using a 1/4" seam. I usually leave a little bit (1/8 to 1/4") of the quilt backing and batting to wrap in the binding for extra fullness around the edges when hand-finishing only. When I machine finish, I trim all the excess backing and batting away so all the layers are flush with the binding raw edge.
From the front of the quilt, I iron the binding away from the quilt top around all four sides. Make sure to remove any markings from your quilt top that may become permanent from the iron heat! Use lots of steam with a very hot iron.
Then flip the quilt over so the backing is face-up and press the binding finished edge down so that it overlaps your stitching line. Again - lots of steam.
Make sure to press nice mitered corners, so your sewing machine catches all the edges with your stitching.
Pin from the front at 3" to 4" intervals.
Check to be sure your pins have caught the finished edge of the binding on the back.
Now you are ready to sew! I have a "quilt in the ditch" foot attachment for my machine that I like to use since I'm not very accomplished at stitching in the ditch. If you have one too, give it a try. If not, just use any foot that will allow you to see your needle clearly so you can place your stitches directly in the ditch between the quilt front and the binding.
Stitch all the way around your quilt, removing the pins as you come to them. Now check it out - you can barely see that stitching line from the front!
And on the back, the corners and all edges are securely stitched down!
Check all around the back of your quilt to see if you skipped over any edges. Sometimes I don't get my stitching quite close enough to the ditch in places, and on the back there is a small section where I haven't caught the binding. Now worries, just put it back under the needle and stitch closer to the ditch and you'll probably catch it on the second try.
The pressing is really the key here. If you've got your binding pressed around to the quilt back slightly overlapping your initial stitching line, you'll have great success and be a pro at this in no time. Practice on something small for your first attempt - a place-mat, pot holder, mug rug, or something of that sort.
If you give this a go, please drop me a note or comment. I'd love to hear about how you fared. Have questions or need more clarification? Let me know about that, too.
Good luck and Happy Binding!
Friday, January 6, 2012
one last finish from 2011
Presenting "It's the Hap-happiest Season of All" - designed and named by Thing 2, machine pieced by yours truly, and machine quilted by a wonderful lady named Carol Linder. Finished on December 30!
Thing 2 and I followed the pattern "Sweet Pea" by Heather Mulder Peterson; it was very simple to cut, piece, and also fat-quarter friendly! I think we used 15 fat quarters and 1.5 yards of dots on white from the 2010 Riley Blake Christmas collection (the name escapes me, but it was definitely 2010).
The pattern calls for appliques of large, daisy-like flowers, but obviously snowflakes are more appropriate here. We found some clip art of snowflakes online and enlarged two different ones for the appliques on this quilt.
I tried (again) to use Steam-a-Seam Lite for this project, but I just seem to have the worst luck with that stuff. It didn't adhere to the fabric very well, so when I tried to pull the final backing off, most of the adhesive on the snowflake edges came right off with it. Grrrrr. But I just edge-stitched all around each snowflake to secure them, so it's all good now :)
Another shot of the fun fabrics. Thing 2 fell really hard for these prints!
The red and white stripe was cut on the bias to make the binding, which was attached front and back by machine. So easy and quick! And check out that cozy flannel backing :)
Next time I make a bias binding I'm going to show you the wonderful ruler I use to cut it. Maybe you all already know about it, but I think it's the greatest little ruler ever. And while I'm at that, I'll also show you how I attach the binding by machine. It's nothing revolutionary, but I think it makes for a very nice finish when you don't want to take the time to hand-sew or you need more durability for machine washing.
Just a couple more shots of the amazing snowflake pantograph quilting.
I chose a light teal/turquoise thread, and I'm so happy with it. That little bit of color adds so much more depth than white thread.
This quilt finished off my sewing year. I went back through my goal list for 2011, and I was pleasantly surprised to see that I accomplished quite a lot of my goals. Here's a list of finishes. Gosh that word "finish" sounds so good to me (extreme procrastinator and easily-distracted-by-new-projects-quilter that I am!)
7 Pillows
7 Wall or Lap Quilts
4 Baby quilts
4 placemats sets/table runners
2 Bags
1 Tuffet
1 Memo Board
1 Tree Skirt
27 finishes!! I wouldn't believe it if I hadn't made that goal list. Kinda puts the pressure on for this year though, huh?
I know it's quite belated, but Happy New Year 2012 to all of you friends out there!
Labels:
applique,
Christmas,
flannel,
holiday,
machine binding,
polka dots,
Riley Blake
Saturday, December 31, 2011
gifts in the mail
My one and only hand-made gift this holiday season: placemats for my brother and SIL :)
The super-easy pattern from Elizabeth Hartman of Oh, Fransson! is found here. There are four separate posts with instructions, so make sure you download all if you want to make these yourself! I did not make the matching cloth napkins as indicated in the pattern, so I only needed 1/4 yard each of the four patchwork fabrics, 1/3 yard of the neutral solid, 1 yard for backing, and 5/8 yard for binding. You can see many more variations of these fun placemats in the flickr group here.
The same five fabrics are used on the front of each placemat, but the placement of each changes slightly according to the pattern directions. Elizabeth Hartman calls for a solid backing to match the binding, but I used the dishes print you can see here in this next photo, because I had plenty of it, and it's just more fun that way :)
The bindings are entirely machine sewn for durability, and the quilting is simple, straight lines in a random pattern.
I spied these fabrics locally early in the year and considered them for my own kitchen, but since I already had so many projects in the queue, I passed on buying them. After my brother and family visited for Christmas, and I learned their new kitchen color was warm peach with burgundy accents, I immediately thought of these fabrics again! They are called "Lizzy Dish" by Lizzy House for Andover Fabrics. Not sure when they were released, but lucky me, they were in the sale area at an LQS in late November.
I had such high hopes for giving lots of hand-made gifts this year, but it just didn't work out that way. Next year I'll have to start earlier... much earlier.
Which brings up a related topic: my project goals list for 2011. I stuck to it much more than I thought was possible for me, and I've already got another on paper for 2012 :)
HAPPY NEW YEAR to you all!
Friday, December 9, 2011
well that only took 21 months!
If you've been with me from the beginning of this blogging adventure (or if you've paged back through old posts to numbers 2 and 3) you might remember this quilt.
Finally after 19 months of stopping and starting, the Italian Tiles quilt is hanging in my foyer!
I finished quilting all but the outer border in September of this year, and then I was just stumped on how to quilt that last bit. I settled on a simple diamond pattern that was easily marked by dividing the border into 3" segments. Then it was just a matter of zig-zagging from point to point, once starting at an inside point and another go-around starting at an outside point.
The binding's been ready for months, and I machine finished it on the back (rather than hand-stitching - too time consuming) so that was a pretty speedy step.
And just in time for the end of fall decorations, we were able to replace the fall-themed quilt that was hanging there for not one, not two, but three fall seasons (and everyday in between), with this new lovely that is much more holiday neutral :)
I'm not really hung up on this "completion thing" when it comes to quilting (obviously), but it does feel oh so good to have this one finished and hanging where we can all see it each day!
Monday, October 31, 2011
Halloween Confetti
Happy Halloween!! I finished my Halloween table runner just in time last Friday, so it will actually be used for a grand total of four days before it's packed away for next year ;-) Oh well, that's generally how I roll when it comes to holiday decorations - haha!
The pattern I used is "Confetti" by Lazy Girl Designs. I highly recommend the Lazy Angle ruler/template for this project - it made the cutting go soooo much faster. (See this post if you'd like more details about the ruler/pattern/construction.) I used 40 Halloween-themed charm squares cut from my stash and 1.33 yards of Moda Grunge in black for the table runner front.
I free-motion quilted an all-over large meander in King Tut variegated thread #925 Obsidian, and finished the binding by machine. I like machine-finished binding for things that will get lots of washing - like table runners, placemats, and baby quilts. The finished size is 16" x 80".
And since I just realized this morning that I managed to buy every kind of chocolate Halloween candy BUT fun-size M&M's, I'm off on a treasure hunt to find what I'm certain are the only three remaining bags for sale in my area. M&M's really are the best fun-size candy... in my opinion!
I hope all your little ghosts and goblins have a fun and safe Halloween!!
Thursday, September 8, 2011
sewin' and cookin' and Martha
One day late in August, Thing 2 finished up two projects in a fit of productivity right before school started. (She's a freshman this year. A fact that is causing me loads of anxiety because I literally don't know how this is possible since she was riding in a car seat only last week...)
First finish was this bright and funky table runner for her bedroom. She was smitten with the pink floral Alexander Henry prints the moment we walked into an LQS, and carried a bolt around with her until finding the perfect pattern. The front of the table runner has the focus fabric paired with some coordinating AH and other prints:
The back is one solid piece of a striped AH print. She stitched the binding on entirely by machine (her first try at this technique) and likes it so much better than hand-sewing it to the back.
The pattern she used:
Immediately after the table runner finish, she brought out an apron that was already cut out - only the assembly steps to go! We purchased this fabric from our local JoAnn's store, but it feels like pretty good quality stuff. The pattern she used is Simplicity 2691.
The perfect baking apron!
I may have mentioned before that our family loves, loves, loves desserts. In fact, we have two 3" binders dedicated to recipes in our kitchen. The first binder is tab-divided into categories like Salads, Veggies, Chicken, Seafood, Pasta - all that stuff you've got to eat to stay alive and healthy. The other binder is tab-divided into Coffeecakes, Brownies & Cookies, Cakes, Pies & Tarts, Cheesecakes, Ice Cream & Custards - all the foods that make eating fun!!
Now here's where Martha comes in... Last week while eating dinner, we were lamenting the fact that we had had no dessert in the house for three nights and hatched a plan. We would cook our way through Martha Stewart's three dessert cookbooks à la "Julie and Julia"! Due to work and school time constraints (and our mutual desire to avoid obesity) we will not have a one-year deadline for this challenge. Rather we will choose 1-2 desserts to bake, evaluate, and share with friends each week. And we won't be baking everything in the books - certainly nothing with "Prune" in the title.
First up for this weekend: Berries and Cream Tartlets on page 33 of Martha Stewart's Pies & Tarts. Other cookbooks we'll be using are Martha Stewart's Cupcakes and Martha Stewart's Cookies.
Stay tuned for updates on our dessert-a-palooza! It needs a better name, though. Any ideas?
Monday, August 8, 2011
shabby chic baby girl
Let's hear it for a "work-in-progress" project moved into the "completed" category! Woo-hoo!
I began working on this baby quilt in January 2000. I found my original notes (on graph paper) in the bag with the completed top earlier this year. The quilt was originally destined as a shower gift for a friend having a baby girl. I'm embarrassed to say that I don't know why I never finished it; I probably wasn't happy with how it was turning out, or I came up with a better gift idea, or I just plain ran out of time. I had two wee ones of my own at home then, so the last scenario is the most likely.
Basically it's a 4-patch on point, with the 4-patches and cream squares at 3" finished; the entire quilt measures 41" square. All the florals are small scale prints in varying tones of pink and peach - so sweet. The cream and the 1" pink inner border are tone-on-tone prints, while the outer 3" border and binding are a repeat of one of the prints used in the center.
The backing was pieced from all the leftovers, and as I'm writing this, I like it almost as much as the front. :)
The center is straight-line quilted in the ditch, while the borders are free-motion quilted with a leaf and vine motif. Great news for those of you that use the blue washout markers to mark your quilting lines. All my border quilting lines (and my original floral motif lines on the cream fabric) were marked using one of those markers years ago when I finished the top. And now, 10+ years later, I'm thrilled to report that all traces of the marker lines disappeared in the wash!!
I attached the binding entirely by machine, using the Red Pepper Quilts method of stitching in the ditch from the front to catch the loose binding edge on the back.
I found that these long-shank flower head pins from Clover worked the best for me in keeping that loose edge secured as I sewed from the front. Make sure to butt them up right next to each other as you pin, and not leave any loose areas to shift - you won't be able to tell if anything is shifting as you stitch from the front. Voice of experience here!
Another shot of the back. A much more modern feel to this side. These shabby chic colors are so out of my usual range, but I do think this is a lovely quilt. I'm not sure where it will end up now that it's finished. We don't have any baby girls coming into our family in the near future, so it's final home is still up for grabs.
The "work-in-progress" pile is still quite high, but finishing this one sure feels good!
Subscribe to:
Posts (Atom)