Pages

Showing posts with label scraps. Show all posts

Monday, February 22, 2016

selvage spools made easier

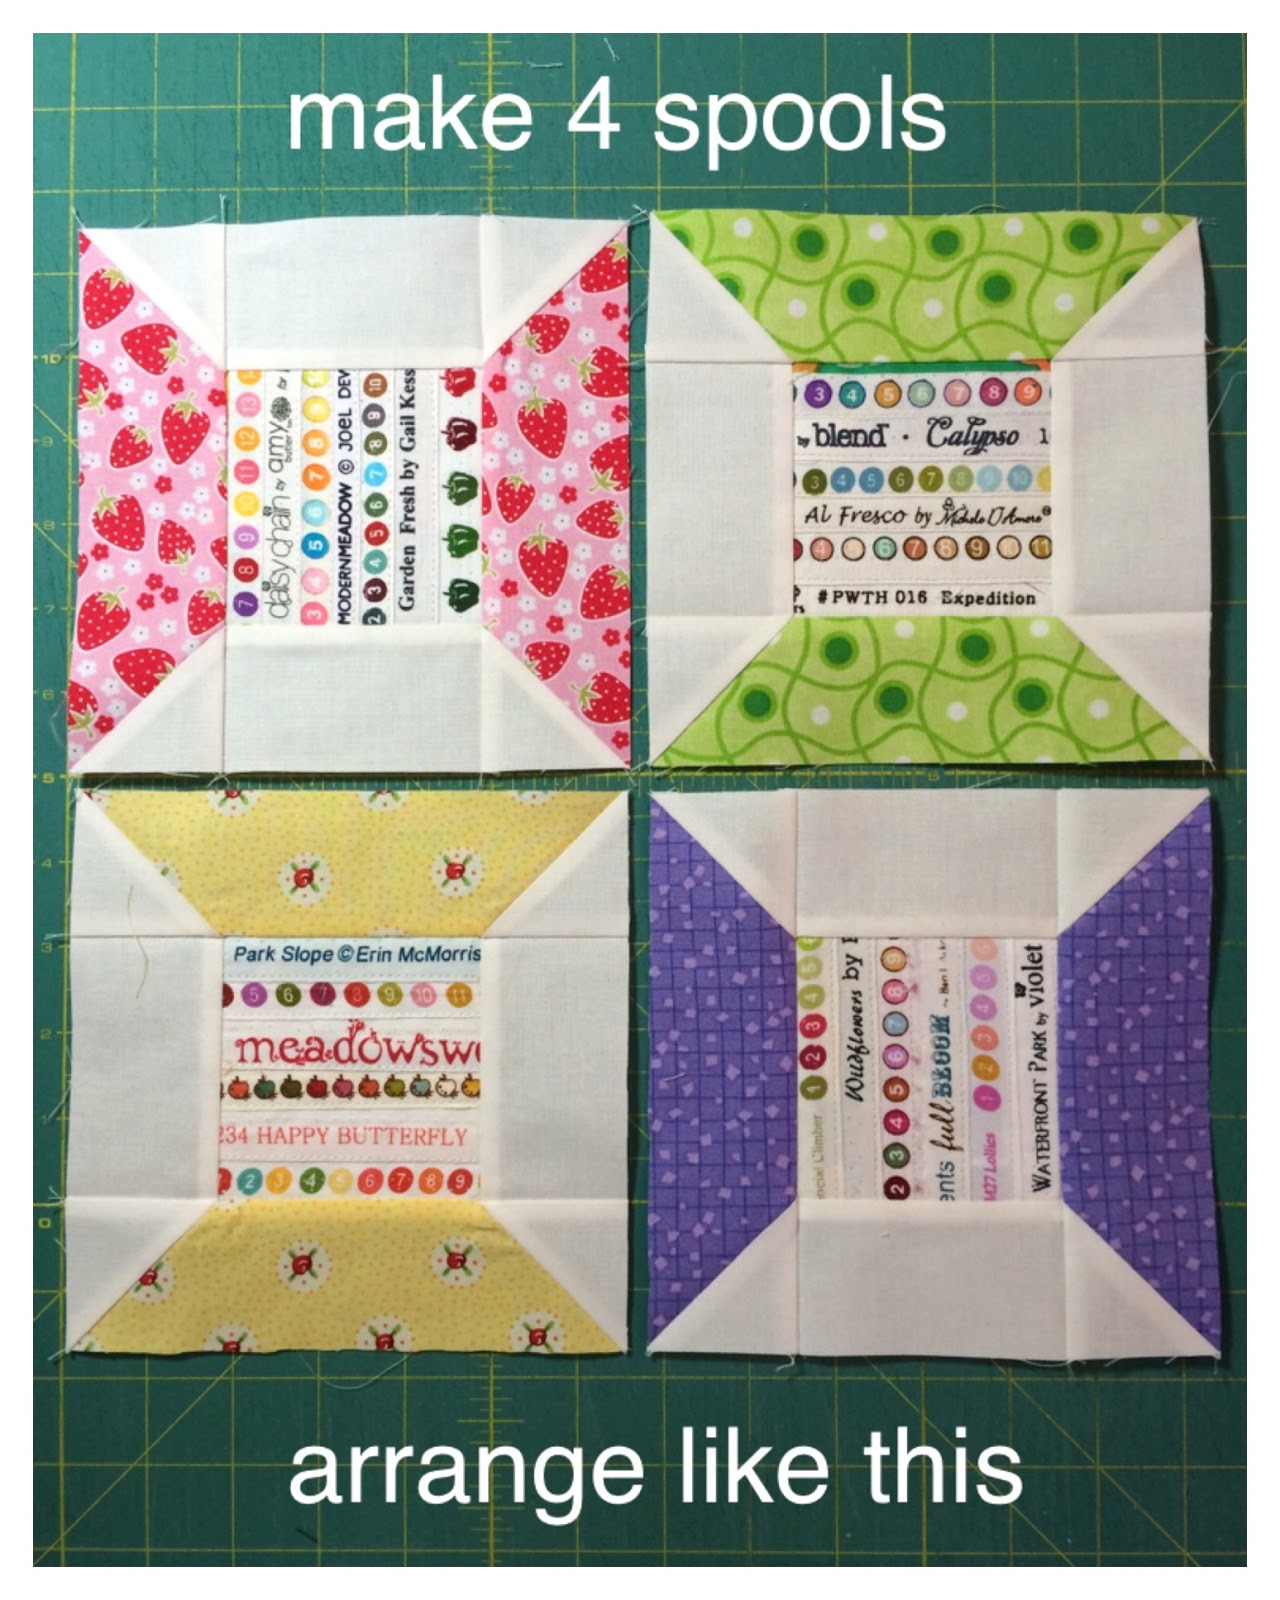
The Crystal Lake Modern Quilt Guild is hosting three block lotteries this year, and the first one takes place in April. We chose the Selvage Spools block from this Riley Blake 2013 Block of the Month program.  You can download and print the Riley Blake block directions here, but you'll probably want to keep reading to discover an easier way to make this block.


The block is composed of four 6" spools to finish at 12" square (12.5" unfinished).

The original pattern uses a template and partial seams - no thank you.  When Lorrie and I met earlier this week to sew the sample blocks for our Sunday guild meeting I made some quick pattern modifications to make it easier.  Easier = Better, am I right?!  Here is my pattern tester block - spot on at 6.5" unfinished :)


I created this tutorial a little differently by adding text to each photo of the steps.  I hope you'll find this easier to follow :)

The materials you'll need for one block:

Using a pencil lightly mark a diagonal line on the wrong side of each 2" square.
Choose selvages with fun words and lots of color dots!


The sewing instructions begin here:

You'll want to center the wording/color dots on the background square.

I sewed this piece about 1/8" from the bottom of the background square so the words wouldn't be cut off later in a seam allowance.

You can choose to cover the printed fabric area of the first selvage or not.

We used 6-7 selvages per spool.


Press these seams toward the background fabric.

Make sure you carefully place the marked diagonal lines as shown.


Press away from the center.
Your spool block should measure 6.5" square now. 


These final seams are all pressed toward the spool end - not the background fabric.


And there you have it - a 12" square finished selvage spool block!


Thanks to Riley Blake for the original pattern and inspiration for this fun quilt block!

Thursday, November 12, 2015

my signature color

Whoa - I finished a quilt almost three months ago and forgot to tell you about it!  This is my Triple Star quilt with lots of fuchsia/magenta/pink so I'm calling it "My Signature Color".


During 2014 I was a member of an online bee group - Modern Instabee Hive 15 - that used quilt patterns from the book Modern Bee: 13 Quilts to Make with Friends by Lindsay Conner.  November was my month for the 11 other members to make blocks for me, and I asked them to use a variety of low volume fabrics for the background and loads of darker pinks for the 16" Triple Star block.  Using these fabrics from my stash (minus the turquoise prints) I made a couple of example/inspiration blocks.


During the months November 2015 - February 2015 Triple Star blocks from all over the continental US and Canada arrived!


The book pattern called for finishing the quilt with plain 2" sashing between the blocks and a couple of borders around the 3x4 block grid, but I changed it to include 4" sashing with additional stars as the cornerstones and no borders. Because I'm contrary like that. And because you can never have too many stars.  A sprinkling of turquoise cornerstone stars breaks up all of the pink.


The quilting was done by Carol Linder in Hampshire, and I chose the "Cracker Jacks" pattern with fuchsia thread - naturally!  The leftover black and white floral backing from this quilt made a fun (and free!) binding.


For the backing I used Wide Back Text in white from Windham Fabrics.


ALL the color names on the back of this quilt!


Many, many thanks to the members of Modern Instabee Hive 15! This is one of my all time favorite quilts, and what a great experience it was to work with all of you!

** I've been busy with some secret Santa sewing the past few weeks that I won't be able to share until January. But Carol currently has my Red Hot Dreamy Hexagons quilt top in her queue, and I've been diligently working on my Flower Garden Quilt. So there are still projects for me to share with you in the few remaining weeks of 2015 :) **

Monday, January 19, 2015

first finish of the year

2015 is going to be the year of finishing UFOs (unfinished objects) and WIPs (works in progress) here at elsie's girl! Since I am great at starting new projects, but not so great at finishing them, I've got quite a (literal) pile-up of projects in various stages of completion taking up space in the sewing room.

Riding the wave of post-Christmas holiday cheer I decided to tackle these two Christmas pillows first and finished them last week. The unquilted pillow tops had been stuck in the UFO pile since December 2012.


My quilt guild (Crystal Lake MQG) is hosting a 2015 UFO Challenge with prize drawings for completed projects throughout the year, and I've registered six UFOs so far. I could register sooo many more, but I'm really trying to be realistic about what I can actually finish before October and not fail miserably at this challenge!  These two pillows are my first UFO Challenge finish, so I'm off to a good start :)


But back to the pillows. The first one was made from a Jaybird Quilts pattern "Candy Dish" and measures 20" square.  The pattern actually makes a 16" square pillow, but it was easy enough to add extra rows and columns to make the 20" covering. All the blocks were cut from leftover fabric from the "It's the Hap-Happiest Season of All" quilt made in 2011 (the back of that very quilt is seen in this photo!)


It is simply straight line quilted with a pale robin's egg blue thread, and as I write this I see that I missed a row of quilting on the right edges of the two red blocks in the center of the photo. Oh well, finished is better than perfect, right?!


My second pillow was patterned after this sweet one from Amy at Nana Company. She designs and makes the loveliest projects :) Mine measures 16" x 26" and is also made with scraps from the same 2011 Christmas quilt.


I added straight line quilting in the same pale blue thread here within the colored fabric blocks, while hand embroidery of the lyrics from my favorite Christmas song fills in the white strips.


It's been a long time since I did this embroidery so I'm not sure what specific DMC floss color I used, but I believe it's only one or two strands in a stem stitch. I can only manage two embroidery stitches - stem and french knot - and those are the only stitches you see here! I seem to remember using more strands of floss for a bit and then taking it out because the stitching was too bulky. So don't be afraid to rip out and start over if you don't like the results. Embroidery is slow work for me, but I'm so glad I stuck with it long enough to finish these lyrics - to me they are the best part of the pillow!


Both pillows have zipper backings. The square one is made from a couple of flannel pieces I had saved from the 2011 Christmas quilt (the front seen here) and has a standard 18" centered zipper insertion.


Because I had a larger piece of this backing fabric, I was able to add a hidden 14" standard zipper very near one of the short ends. I always use this tutorial from House on Hill Road for hidden zipper pillow backings.


One of the requirements of the guild UFO challenge is that when you finish a project it must be shown at the next guild meeting to be eligible for the prize drawings. So I'll be taking these to our February meeting and then packing them away until Thanksgiving weekend much later this year. Chances are excellent that I'll forget all about these pillows until then, and it will truly be like Christmas when we decorate again in late November and I rediscover them!

One UFO down, five to go!

Monday, November 25, 2013

one last fall project

In my house there are no Christmas decorations allowed until after Thanksgiving, so I've still got a few days left to enjoy this scrappy pumpkin...


Pumpkin fabrics: Lots of 2.5" squares of Kaffe, a little AMH, some Tula Pink, and some Michael Miller, swapped and shared from stash with my friend Andrea. Background: Kona Taupe (I think).


Quilting: outline/echo straight-line stitches in taupe using the even-feed foot on the background, and free-motion contouring in an orange variegated King Tut thread on the pumpkin.


Backing: An out-of-print Kaffe Fassett fabric called "Fans". Binding: Kaffe "Exotic Warm Woven Stripe", also from the stash!


Final measurements: 16.5" wide x 15.5" high. A hanging sleeve on the back holds a very small dowel rod that slips right into a pair of little 3M hooks mounted on my kitchen pantry door.

Given the small size of this project I didn't make use of a huge quantity of scraps, but the only thing I had to purchase was the background. In fact, now I've got even more scraps because Andrea and I just cut and cut and cut orange squares for an entire afternoon, not really paying attention to how many we might use. We've each got enough squares cut for 3 or 4 of these projects! My excess squares have been neatly tucked away in the 2.5" square bin for next year - maybe they'll become some fall-themed trivets using Insul-Brite as the batting?

Friday, November 8, 2013

everlasting pumpkins for fabric lovers

Christmas ads are already inundating us, but there are still a few weeks of fall remaining. Plenty of time for you to make a batch of these pumpkins to decorate your home for Thanksgiving.


I made these three last weekend, and it took me about one hour per pumpkin - a great way to spend a Saturday afternoon. The project will go even faster if you've got a willing crafty helper :)

You can find these carve-able pumpkins at JoAnns, Hobby Lobby, Michaels, and most chain craft stores. You'll also need fabric scraps, matte finish Mod Podge, and a foam brush.


I cut my fabric scraps into roughly 3" squares. I cut them with scissors, eye-balling the dimensions. No need for precision cutting on this project!

Beginning near them stem, brush a swipe of Mod Podge larger than your fabric square on the pumpkin. Place the fabric square on top of the Mod Podge, tamp it down, and then brush another layer of Mod Podge over the top of the fabric square.


Continue this process - layer of glue, fabric, glue over the fabric - down the side of the pumpkin, overlapping the fabric edges as you go.


Yes - this is my mostly Kaffe (and friends) pumpkin!


When you get to the bottom of the pumpkin with a "column" of fabric, start working your way back up to the stem. Continue until you have the entire pumpkin surface covered with fabric.


Check for any edges that may have lifted and re-glue them with another swipe of Mod Podge. Then you just have to wait for them to dry - usually only a couple of hours.


Now you've got some everlasting pumpkins to decorate your home. I've displayed mine on the fireplace hearth, but the outside photos are so much prettier!


You could cut your fabric scraps into any shape - rectangles, triangles, circles, diamonds - go crazy and have fun!

Next year I want to cover some white pumpkins with large dots of black and grey fabrics. What do you think?

Friday, November 1, 2013

Thank You Lynn!

I have a wonderfully spunky friend Lynn (who always has the most infectious smile on her face) with mad skills in graphic design. Earlier this year (much earlier) she designed a logo for our newly forming Crystal Lake Modern Quilt Guild. In order to thank her properly with no funds to our name, we designed and made a quilt specifically for her.


And now that quilt has been delivered to her! After I finished sewing the quilt top, Paige (our CLMQG President and amazing machine quilter) finished this on her long-arm machine with an all-over pattern of swirls and curls in a light yellow thread.


The backing is one of my favorite prints from Heather Bailey's Pop Garden line - Pop Daisy in Red.


Lorrie (another CLMQG member and friend from SewMod Designs) sewed the red and white polka dot binding.


And this is my lovely friend Lynn. If you are ever in need of some awesome graphic design work, drop me a line and I'll pass your info to her. She really is the best!


Thanks Lynn!!

You can read more about the construction of this quilt here. The finished size is approximately 63" x 68".

LinkWithin

Related Posts Plugin for WordPress, Blogger...