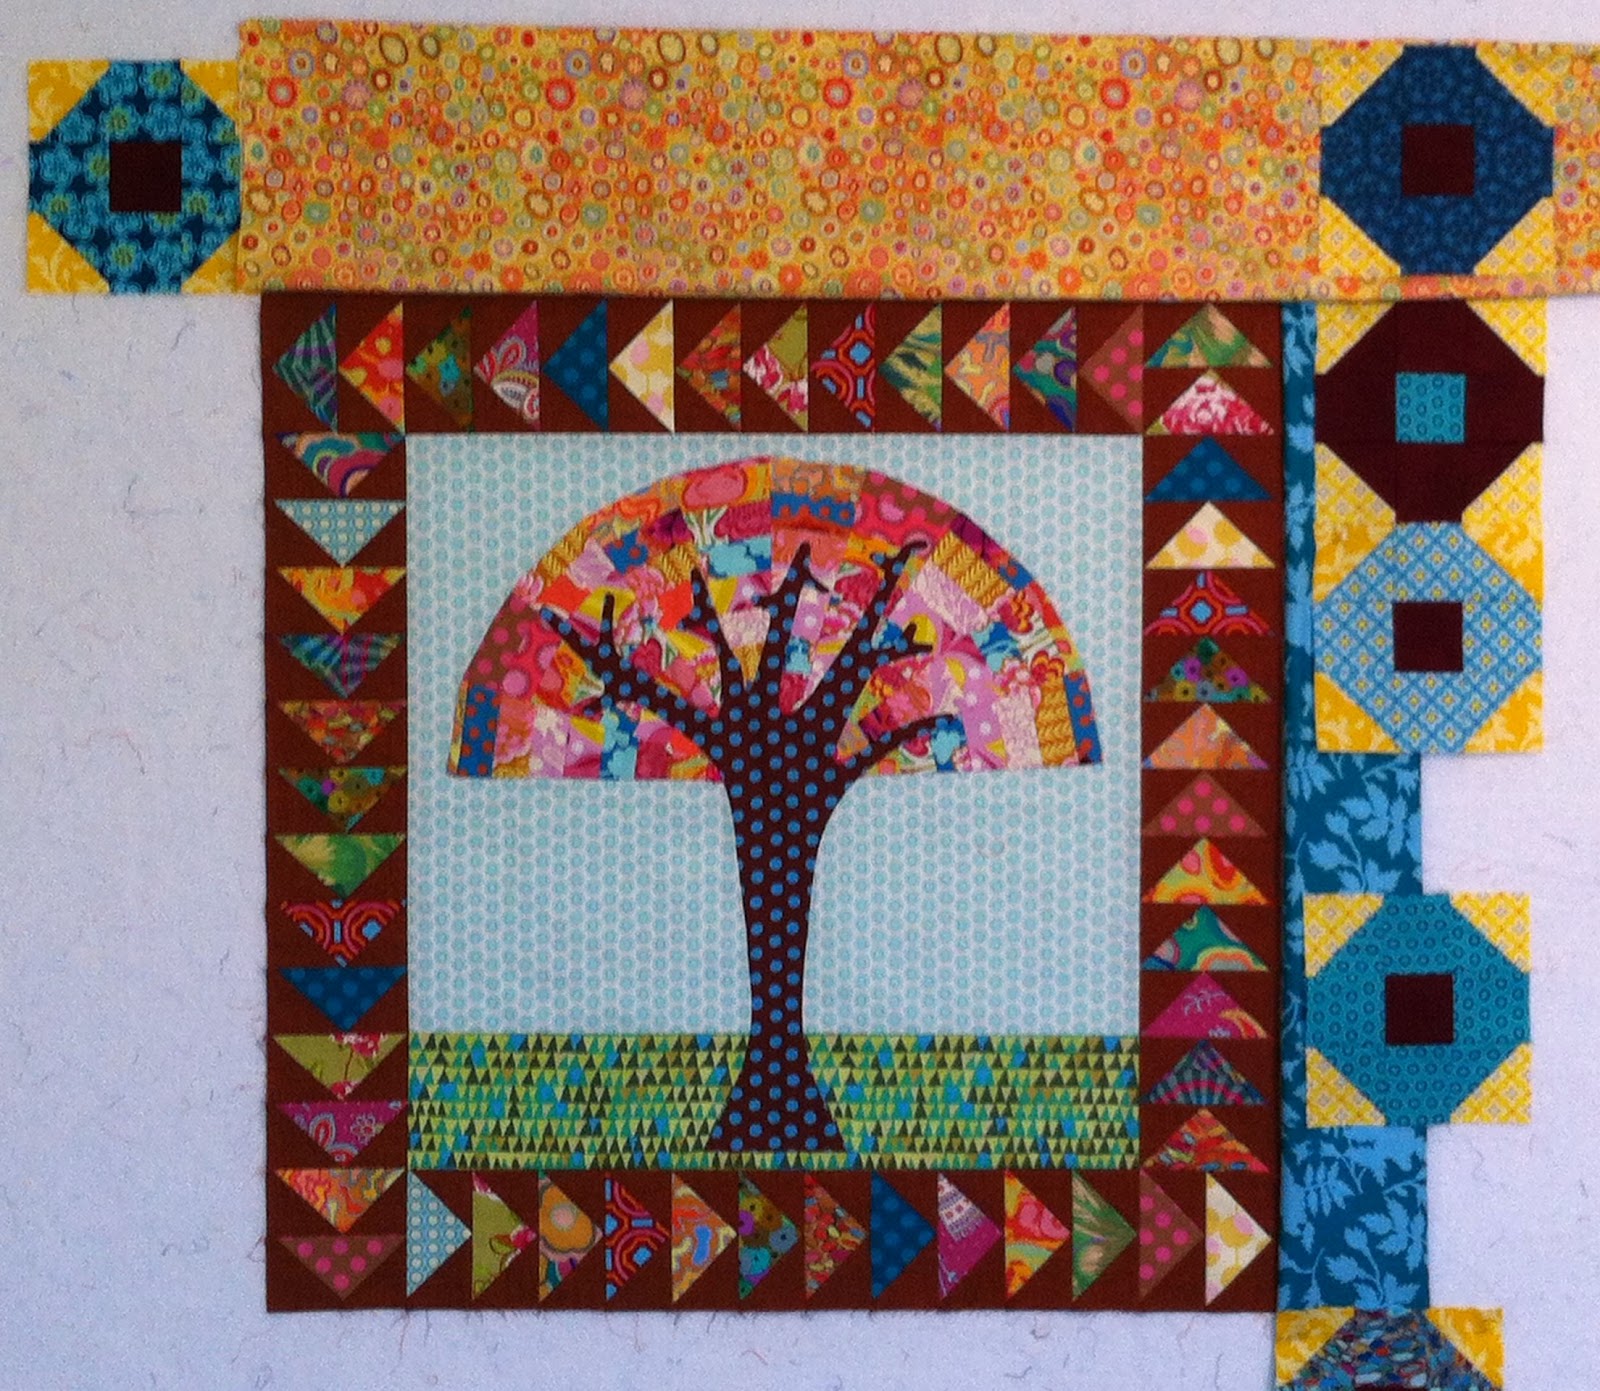
I'm playing catch-up on my Border Challenge Quilt! May's design requirement for border #4 was tumbling blocks. I decided to make a very scrappy border of elongated tumbling blocks cut using my Wright's Easy "Fat Cats" ruler.
Each tumbler measures 6.5" in length. Most of the Kaffe, Anna Maria Horner, and Amy Butler fabrics I used for this fourth border are already included elsewhere in the quilt. I never set out to make this a scrappy quilt, but that seems to be the way I'm headed, and I really love how it's turning out!
Another requirement I had to meet for May was to incorporate the color grey - determined by drawing from the infamous crayon bucket. I didn't include any fabrics that are predominately grey, but one of the blue fabrics has some definite grey in the "pebbles" background. You can see it in the bottom right corner of the top photo.
The quilt top now measures 58.5" wide and 65.5" long. The final border requirements are to incorporate applique (yay - finally!) and the color green. Can you say "flowers and vines"? Exactly how I was hoping this project would end!
Showing posts with label BorderChallenge. Show all posts
Thursday, July 18, 2013
Tuesday, May 14, 2013
border challenge 3
My Border Challenge class meets again this week, and I am ready!
For the third round, our design element assignment was a four-patch block. Ugh. The second border I had added felt square-ish enough already, so I decided to include only a few four-patch blocks (tiny ones at that!) and to set them on point. My color requirement - determined by drawing a crayon - was blue green. Hey - I can work with that! In fact I already have in both the first and second borders.
The most challenging part of the assignment was this ugly fabric... Yes, it had to be included somewhere in the border. I've heard that no fabric is ugly if you cut it up small enough, so that's what I did. The squares in my four-patch units are 1" finished! Now look back at the first photo... Doesn't seem quite so ugly, does it?
I went with a relatively simple border this time. While I love the top so far, it was feeling just on the edge of being too busy and a bunch of four-patch blocks all around would have tipped it right over that edge. But I think the 3" of blue green and 1" of burgundy all around stop the "busy-ness" and ground everything in the center. Which means now I can go crazy on the next border! We have two more challenges until the class ends, and I'm hoping for triangles and applique to be our remaining design element assignments. We'll see what happens on Wednesday!
Can you see the strips of Kite Tails in Emerald on the top and bottom between borders #2 and #3? I had some strips left over from the back of my Twinkle quilt, and the colors seemed to be perfect, so used them to elongate the quilt into a rectangle. And it really is straight along the bottom. I think I was a little too heavy-handed when smoothing it out over the design wall, stretching it out a bit too far on the right bottom.
Current size is 48" x 55".
The blue-green border fabric is Carolina Chambray from Kaufman in Marine. I purchased this fabric at an LQS - Sew Generously - but can't find it in that color online to provide a link for you. It's like a shot cotton with two different thread colors for the warp and weft, but a little heftier in weight and body. Very nice.
The ugly fabric is... hmmm. How can I say this politely? It's not the ugliest fabric I've seen, but I won't be searching for more of it ;)
Three borders down, two to go!
Wednesday, April 24, 2013
border challenge 2 ready
My border challenge class meets again tonight, and my homework is done just in time. I have never changed my mind about a quilting project so many times as I have in the last few weeks regarding this...
This month our assignment included three parameters. My border must include this color...
The charm square is the actual color sample I received, and the fabric beneath it is what I chose to match it. It isn't exact, but close enough. The method the instructor used to assign our color was a bit cruel. She had a charm pack of near solid, tone-on-tone prints; we were instructed to pass it around and choose our favorite from the bunch. I selected a lovely lavender/rose color that I knew would coordinate nicely with the other fabrics I had already used in the center and first border. But of course that would have been too easy - once we had all picked a color we were instructed to pass it one seat to the left! That's how I ended up with this burgundy color.
The second requirement we were all given was to include a shoo-fly block somewhere within the second border. This was again determined by one of the students choosing a random number that corresponded to a page in a book of quilt blocks.
Lastly, we all "counted off" into four groups and were assigned a shape to incorporate independent of the shoo-fly block. My group got "squares" while others were given circles, triangles, or rectangles.
I knew I could live with the color assignment since we can use as much or as little as we want within the border, so I set about trying to sketch some color and block options...
I decided on this non-traditional placement of fabrics for the shoo-fly block based on a modern quilt image I found on Pinterest.
My original plan was to alternate the burgundy and teal 6" blocks for the entire border, but I really disliked that look. The scale was too big and the coloring was all wrong...
Then I settled on a smaller 5" shoo-fly block for just the corners, and used a very similar nine-patch variation for all the other blocks. This way I could incorporate many of the same colors I had already used, but still meet all three requirements: burgundy color, shoo-fly block, and squares. Woo-hoo! This is the part of the border I'm really happy about.
But I felt like something was needed to separate the flying geese from this border, and I could quite find the right fabric. I love this yellow print, but no. And the teal solid is nice too, but again, no...
Maybe the brown/blue spot from the tree trunk? Still not quite right...
I finally landed on this Paperweight print from Kaffe in Leafy. I'm not completely convinced that it's the best choice, but I'm counting on being able to repeat it again later to tie it in better. It does draw out the grass green in the center and highlight the greens in my flying geese. But as I look back through these photos, maybe I didn't really need anything to separate the two? I don't know.
Another thing I'm second-guessing is leaving out a small burgundy cornerstone where the green borders meet. Probably should have done that...
It does make me smile that the border is a little diary of some of my favorite fabrics. You can see the Emerald Kite Tails backing from my Twinkle quilt above, as well as some wine bottles and bookshelves from a recent line of "Grand Tour" prints from David textiles.
And below you can see some small bits from the Amy Butler tunic I just finished (a full report on that later) and the teal flowers leftover from my daughter's college quilt.
My homework isn't 100% complete though. I'm planning to add a final border (1" - 1.5") of the burgundy to the outside edge to "seal off" these blocks before adding the third border. But I've got to get some more of the burgundy. I guess a half-yard isn't always enough!
If you've read all the way to the end, congratulations! This is a particularly wordy post, but I wanted to document all the pondering and deciding and undoing it took to get to this point. I'm not loving it yet, but one of the main reasons I took this class was to break out of my comfort zone and challenge myself to be more fearless with color and patterns. Whew... only three more borders to go!
Oh, and it's up to 41" square now.
Tuesday, March 12, 2013
border challenge - flying geese
Part 1 of my Border Challenge is complete! Flying geese all around...
Each one finishes at 1 7/8" x 3 3/4". There are 52 flying geese making up this first border, and the overall size of my quilt is now 29" square. I had to shave just about 1/4" total off of the center to make the geese fit correctly, but otherwise I think I lucked out in getting them to fit.
To give the borders the look of flying beyond the center corners, I first sewed the bottom border beginning at the bottom left corner and ending about half-way across the block - a partial seam. Then I could sew the left border completely from top to bottom. Continuing clockwise around the center block, I sewed the top then the right borders completely, finishing with the rest of the bottom border seam. Just a couple of extra steps that really change the look!
I used the fast flying geese method that makes four identical geese units from just 5 cut squares with no waste. You can view a great tutorial here that shows two methods - making one block at a time and the one I used to make four blocks. This tutorial also gives you the formulas for cutting your fabrics based on the finished block size you need.
The brown fabric used to make the geese is Kaffe Fasset shot cotton in Terra Cotta, and the colorful bits are some of the same fabrics I used in the tree with additional Amy Butler, Kaffe, AMH, and Michael Miller fabrics tossed in for variety.
Our next class meets March 20, which means that I have my homework done early, which almost never, ever happens! As the months roll by and the quilt top gets larger and larger, I suspect I'll need every bit of the 30 days between classes to finish my assignment. I'm excited to see what the next challenge brings!
Subscribe to:
Posts (Atom)