But it really isn't! Meet the latest tool to help you easily mark quilting lines - the Frixion Pen by Pilot.
It comes in range of colors (black, blue, red, purple, orange, fuchsia, etc) and was originally designed for crossword and sudoku puzzle enthusiasts who wanted an erasable pen. Yes, it is erasable on paper, but even better for quilters, it disappears from fabric when touched with a hot iron! Here I have marked a swatch of my latest project with a black Frixion pen:
Touching it with a hot iron:
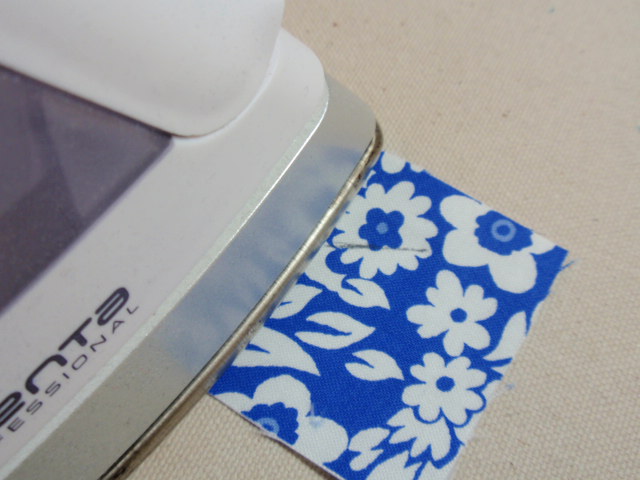
and "TA-DA", the black marking is gone!
As with any marking tool, it's best to test it on all your fabrics before making a full commitment to using it somewhere that may cause you great anguish if it, in fact, cannot be removed. In these next two shots, I've marked all my fabrics with the pen to test it:
And now after ironing, the black marking is gone.
You can see a slight bit of white residue on the darkest fabric, but since I'm going to mark quilting lines that will be stitched on, that bit of white is just fine with me.
I used the black pen to mark all the quilting lines on this project, and I'm happy to report that after quilting, all the marks did indeed disappear, and I cannot find any traces of residue :)
DISCLAIMER: Some of my LQS customers did report having problems with these pens not removing from batik fabrics. So even though I already said it, I'll say it again. Make sure you test it first! The pens are probably available at your LQS, but if you can't find them there, try an office supply store like Office Max or Office Depot. The pens I tested were sort of like a very fine felt-tip; I know there are others being sold that resemble a highlighting marker in color and appearance, and I can't speak to how well those work. But those "felt-tips"? Well, I've got one in every color now!
Oh, and another thing you should know - if the project you've erased the markings from is exposed to cold temperatures (say the freezer or your cold car sitting outside overnight) the markings will come back! You can still remove them again with a hot iron, but I'm just letting you know :) I'm sure you don't routinely put your quilts in your freezer, but I'd hate for you to load up your car with a precious wedding or baby shower quilt gift in some freezing cold weather, only to discover that those black markings have re-appeared as the bride/mom-to-be opens your one-of-a-kind gift. Be prepared!
And just in case you're wondering, this is the quilt top that I was working on while testing the pens. It's called "Breakfast Blues", and it's the February Breakfast Club II project I'm teaching at my LQS :)
Showing posts with label tools. Show all posts
Monday, February 6, 2012
Thursday, April 28, 2011
my favorite quilting tools
Some people doodle. I graph.
Graph paper is a beautiful thing. So symmetrical, so orderly, so organized.
I ♥ graph paper.
I draft most of my pillow ideas on graph paper. I know my finished dimension - say 20" square - so I can just put my trusty pencil to paper, count out 20 little squares to the right, then down, then back left, and up to the starting point. And there's my empty pillow canvas just waiting to be filled with squares, triangles, or whatever geometric goodies I desire!
I get a weird kick out of doing math in my head, and the graph paper provides a visual representation of all my quilting math. But what's a graphed quilt design without some color? Color combinations do not come easily to me, so my trusty colored pencils let me try out options before cutting into my fabrics.
Once I've got a layout and color combo that I'm happy with, I add cutting instructions and other notes.
Here's what I've been graphing and coloring this week.
I want to make a "Tree of Life" quilt using Sarah Fielke's new line "From Little Things", but the free pattern with the fabric line involved lots of templates and not very clear directions. So I decided to use the pattern in Edyta Sitar's book Friendship Triangles but wanted the blocks to be larger than 14" to show bigger pieces of her large prints.
No problem for my trusty graph paper! Using her diagrams in the book, I broke down the block into a 7 x 7 grid, made each grid section 2.5", and ta-da... a 17.5" finished block. Yay! I've got most of the three leaf sections sewn, so only the trunk and backgrounds remain. Those look to be the most difficult parts, but the graph paper has helped me break it down into manageable pieces and document all the things I've cut and assembled correctly, and to fix the parts where I've made mistakes. Yes - the graph paper limits my mistakes, but doesn't eliminate them ;-)
If you don't have any graph paper handy, you can print some directly from Moda's website under "Fun Stuff" and "Downloads" here. Let me know what tools you use when drafting projects.
Monday, April 18, 2011
quilting meets Laugh In
So I'm really showing my age here, but doesn't this make you think of Rowan and Martin, Lily Tomlin, and Goldie Hawn??
This is a block for Lynne at Lily's Quilts. March was her month (yes, it is very late) in the Fresh Modern Bee. She asked for a block with NO straight seams. Only curves and wavy lines. Yeah, not so much fun for the left brained crowd.
I've had an apple core block template stashed in the drawer for a while, so I thought I'd pull it out and give it a shot. I knew that I wanted to put the bright orange and red on the block as appliqued flowers, so I cut out apple cores from the blues, greens, grey, and brown Kona solids Lynne provided. The print is a gorgeous one from Prints Charming - didn't she pick great fabrics?
Turns out that piecing this block on the machine was nearly impossible for me. So with complete [completely unfounded] confidence, I pulled out my trusty hand-sewing kit.
Slowest. Block. I. Have. Ever. Made.
Hence the missed deadline.
I hope you like it Lynne. It's a one-of-a-kind. My first, and last, apple core block... probably... But then again, it really kind of grew on me after those crazy flowers were added.
Anybody out there ever made a quilt of apple core blocks? Any tips for me?
Thursday, March 24, 2011
March Blogger's Pillow Party
March has me thinking of daffodils, green shoots popping up from the ground, and warmer breezes that bring the scents of spring. So my latest pillow combines all my favorite parts of spring: sunny yellow and fresh green with some spinning pinwheels to twirl in the breeze...
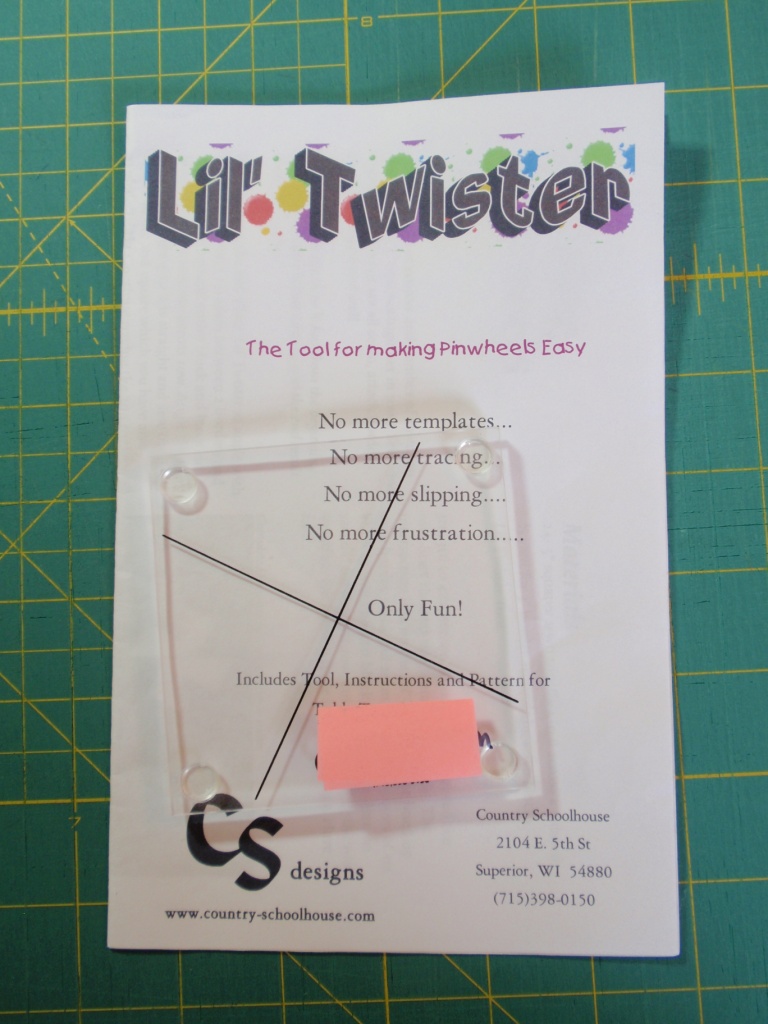
This pillow will be living at my LQS until the end of April when I'll be teaching a group how to make these fun blocks with the L'il Twister Tool.
I quilted some twirling loops inside the pinwheels to add a little more movement, and some vining leaves in the green dot borders.
Another envelope closure with a contrast binding to finish it off. I can't wait for the end of April when it can come back home again!
Be sure to head over to the Blogger's Pillow Party to see many other beautiful and creative pillows :)
Fabrics used are Moda Origins by Basic Grey charm pack, Kona cotton in Snow, and Michael Miller Ta Dot in Moss.
Thursday, November 11, 2010
Wee Woodland Pinwheels
Another baby quilt made using the L'il Twister Tool (previously blogged about here) ...

This time I used a Wee Woodland charm pack from Moda by Keiki, some Quilters Linen for the background, Moda Crackle in brown for the flange and cornerstones, and the green alphabet Lollipop print from Moda by Sandy Gervais for the final border.
Here's my favorite pinwheel block with the little bird and the lone bit of pink in the quilt...

And I do LOVE a flange! They are so easy to add, yet they provide such a great frame for the quilt center...

I think I'll try a corded flange next time. The Wrap 'N Fuse piping seems like just the ticket to make that a simple addition.
Happy Sewing!!
Thursday, October 7, 2010
A garden of pinwheels
My L'il Twister pinwheels quilt is now finished!

We are having a most spectacular weather week here in Northern Illinois! I'm trying to just enjoy it and not think about what will be following it in the not-so-distant future :)
Happy Columbus Day weekend!

I did lots of straight line quilting in the center, some free-motion loop-de-loops on the inner border, and lots of free-motion spinning daisies on the outer border. The quilting is still my least favorite part of the entire process, but I am becoming more comfortable with it. I guess it's like anything else in life - the more you do it, the easier it gets :)
This is the first time I have done the binding entirely by machine for a quilt. I've done some small potholders, but never an entire quilt! I have to say that it was easy-peasy. I cut the binding at 2 1/2" (I usually cut 2 1/4") and stitched it to the front as usual. Then on the back I used some 1/4" Steam a Seam to fuse the binding down before stitching it. Binding time from start to finish = 1.5 hours. I'll take that! I don't think I would use the machine method for something fancy-schmancy, but for a baby quilt that will hopefully get lots of use and see lots of washing time, I think it works.
Here is a better view of all the different quilting (you can really see the cute daisies better on the backing) and the binding back...

I forgot to take a photo of the whole thing after completion, so here's a previously posted photo of the top...
Here is a better view of all the different quilting (you can really see the cute daisies better on the backing) and the binding back...

I forgot to take a photo of the whole thing after completion, so here's a previously posted photo of the top...
We are having a most spectacular weather week here in Northern Illinois! I'm trying to just enjoy it and not think about what will be following it in the not-so-distant future :)Happy Columbus Day weekend!
Wednesday, September 22, 2010
baby pinwheels finish and Kaffe quilt
Earlier this week I finished the baby pinwheels quilt top that I wrote about last time. The L'il Twister tool delivered what it promised, which was easy pinwheels. I even got over the amount of fabric waste caused by it's use :)

I was very unsure of this border before I sewed it on. My original plan was to use this fabric lengthwise (instead of crosswise as shown here) in order to show a unique complete flower stripe on each side of the quilt without cornerstones. But one look at that on the design board, and I knew that would be waayyy too overwhelming... the borders would completely overpower the pinwheels. There is still a LOT of pattern, and it's still growing on me, but I'm leaning towards being happy with it. The cornerstones were a definite necessity with all that busy-ness.
Not sure where this quilt will end up, but in the near term, it will be hanging at my LQS where I have a class planned for the October/November time frame.

On another note, my Kaffe Crayon Box is completely complete! I got it back from my genius long-arm quilter and friend, Paige, and got the binding on just in time for a local quilt show last weekend. The show was held at a nearby garden center, where the staff hangs all the quilts inside the greenhouses with lots of lovely flowers. It isn't a judged show, just a gathering of quilts made by local people. Every year it gets a little bigger, and a little better attended, but the main point is just to view all the pretties made by others in the area.

Now that it is back in my house, I've got to decide where to put it. I put some hanging tabs on the back, just in case... and we do have plans to re-paint and re-decorate a room... hmmm...
Thursday, September 16, 2010
adventures in pinwheels
I'm trying out a new tool this week called the L'il Twister; it's supposed to make pinwheels easier. Right out of the gate I'm a little skeptical, because how could they be any easier than the half-square triangle kind? But I'm giving it a go with these cute fabrics... lots of polka dot charm squares, some Moda Bleached White solid, and a flower stripe from Michael Miller:
Start by making a four-patch unit with charm squares and border it with 3" cut strips on all sides...

add this tool...

Cut like so...

Re-arrange like so...

And sew it all back together to make this ultra-cute pinwheel! The finished block is 9" square.

As I was going through this process, I was thinking, "this sure is a LOT of seams and cutting to make a 9" block! And this (photo below) is a LOT of waste!" (BTW - I loathe fabric waste, except in the case of paper-piecing New York Beauties... I mean how else are you going to get those super-sharp points, right?)

Anyway, even though I was extremely skeptical and so sure that I would not be happy with this tool, I can report that I AM happy with it. Those pinwheels are so cute and the process required little more thought than which charm squares to put together, that I have been won over. I'll keep you updated on the progress of this project; it's going to be a baby quilt when it's finished.
Incidentally, there is another Twister Tool sized to use with layer-cake squares and several projects for using both tools in the new book Let's Twist published by Country Schoolhouse Quilt Shop. It seems that quilt shops are having a difficult time keeping these items in stock, so I don't know where to direct you to purchase them. If I get more info I'll pass it on!
Start by making a four-patch unit with charm squares and border it with 3" cut strips on all sides...
add this tool...

Cut like so...

Re-arrange like so...

And sew it all back together to make this ultra-cute pinwheel! The finished block is 9" square.

As I was going through this process, I was thinking, "this sure is a LOT of seams and cutting to make a 9" block! And this (photo below) is a LOT of waste!" (BTW - I loathe fabric waste, except in the case of paper-piecing New York Beauties... I mean how else are you going to get those super-sharp points, right?)

Anyway, even though I was extremely skeptical and so sure that I would not be happy with this tool, I can report that I AM happy with it. Those pinwheels are so cute and the process required little more thought than which charm squares to put together, that I have been won over. I'll keep you updated on the progress of this project; it's going to be a baby quilt when it's finished.
Incidentally, there is another Twister Tool sized to use with layer-cake squares and several projects for using both tools in the new book Let's Twist published by Country Schoolhouse Quilt Shop. It seems that quilt shops are having a difficult time keeping these items in stock, so I don't know where to direct you to purchase them. If I get more info I'll pass it on!
Tuesday, April 27, 2010
A sweet new needle case
I have Kelli, a friend from my modern sewing group, has THE cutest little needle case that I have been coveting, so on Sunday when we got together she suggested I trace it and make my own. Of course the project took about 5 times longer than I expected, but the result was worth it.
All I needed was an 8" square of outer fabric, 8" square of lining fabric, an 8" square of batting, and a 7" square of coordinating felt. I made a pattern using regular printer paper from the tracing I took of Kelli's case, but had to make another because the first one wasn't symmetrical. A little cutting, sewing, pressing, and top-stitching and voila - a lovely new needle case!
The sides fold in to make it collapse, and a velcro tab keeps it closed when not in use.
I added a button to raise the cuteness factor, and now it's complete!
The fabrics used are Kaffe Fassett Kirman in Grey, Kaffe Fasset Spots in Fuschia, and some screaming neon green felt that I had on hand.So now I still have all the unfinished projects that I had when the day started, but one of the projects on my mental to-do list is finished! That still counts as a finish, right?
Subscribe to:
Posts (Atom)