Pages

Friday, August 30, 2013

this took forever

At least it felt like forever! These two little 8" blocks were my first assignment in the latest Amitie Textiles Block of the Month program, "Bring Me Flowers" Each previous BOM they have put together has been spectacular, and in the past I've always kicked myself for not joining as I watched my online friends churning out all these amazing blocks. So this year I jumped in!


I'm going to spare you all the gritty details about every misstep I've made, but the basic story is this: these blocks are intended to be hand-pieced. My hand-piecing skills are quite rusty, so I intend to machine piece where I can and muddle through or improvise the rest. The real treat is the eclectic assortment of beautiful fabrics they send each month, and since I didn't want to waste any of them, I wisely decided to make a test block first with some scraps. That's where the "wisdom" ended for me on this journey.


Thinking I was a pretty smart cookie, I decided that those double pinwheels could be easily machine pieced by making some smaller half-square-triangles (HSTs), cutting those into quarter-square triangles (QSTs) and then sewing the QSTs to another larger triangle.

Uhhh, what just happened?


Try #2. Okay, I'll cut all the triangles and forget about that brilliant shortcut that was neither brilliant nor a shortcut.


So far, so good. Poor fabric choices, but you get the idea - these blocks look correct.


Woo-hoo! Double pinwheels made with the real fabrics look great!


Then on to the "basket" section. I cut one large square of the basket fabric and two smaller squares of the background fabric to sew diagonally and make the triangles at each corner. And I spent quite a bit of time calculating how big the background squares needed to be. Not enough time apparently, because both were incorrect and the basket was too large on the first try and too small on the second try. Oh, and when the basket construction started, I was feeling pretty sure of myself and used the real fabrics. Whoops.


After more cutting and re-cutting, un-stitching and re-stitching, I finally wound up with two correctly sized baskets. Add in some time making bias tape for the stems, freezer paper templates for the circles, and some sewing time appliqueing the center circles and you get...

FOREVER.


But now they're done, and I'm pretty darn happy with these little cuties :)


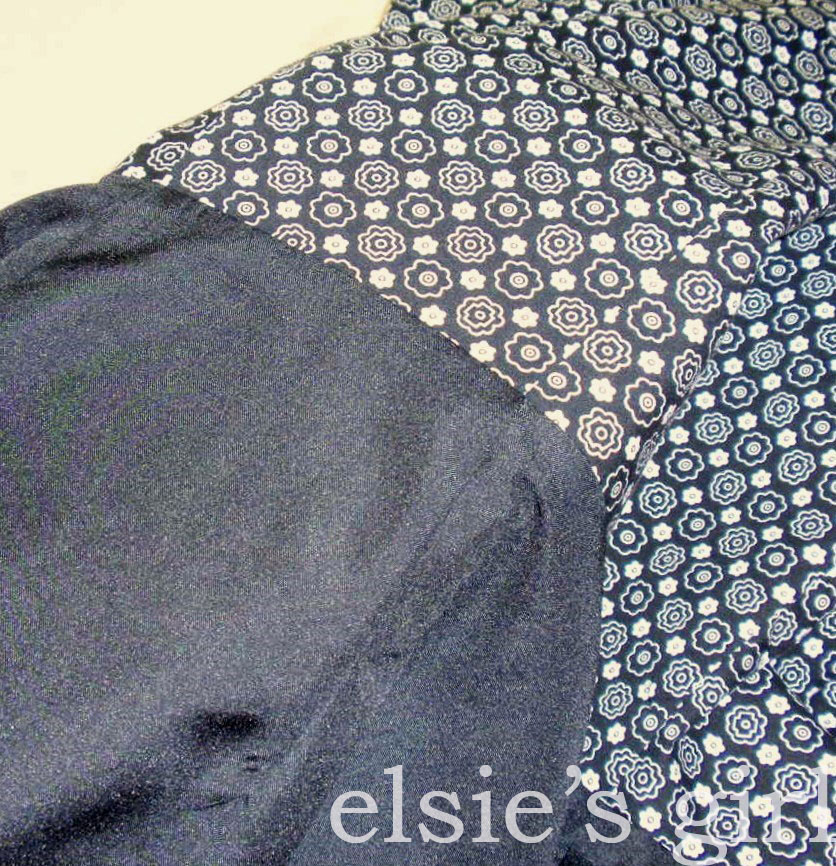
Included in the instructions is a statement informing me that many of the fabrics sent this month will be re-used in future months. Hmmmm. Since I've used ALL of one of the background fabrics and most of one of the floral prints during this learning adventure, my quilt will end up being truly unique (which I'm actually quite happy about) because I'll be doing some fabric substitution in those future months! Oh well, it's all part of growing and stretching yourself to learn new things, right?!

And I'll definitely be putting a label like this on my finished quilt. Haha!! You can buy them here.


Friday, August 23, 2013

summer skirts

Even though we are down to the last few weeks of summer, I've got a couple of new skirts to show you. This has been my most successful year at attempting a "summer of no shorts". This past spring I came to the realization that I don't like wearing shorts - I know - weird, right? But lately it seems more difficult than it should be to locate a decent-fitting pair that isn't too short or too marmy. Wearing them around the house isn't so bad (and I still do that), but when I'm out and about I just really love a cute skirt. In June my family took a 12 day vacation, and I didn't pack a single pair of shorts, but I did pack and wear several skirts. They're cooler (temperature-wise), girly-er, and waaayyy more fun. And with all the beautiful fabrics available these days, why not make a closet-full of them - a different one to suit your every mood and occasion?

I snagged this book - The Essential A-Line by Jona Giammalva - earlier this summer because I wanted to get some more experience at custom fitting a basic pattern. And yes, the subtitle "Make 17 Flirty Skirts from 1 Basic Pattern" definitely influenced my purchase decision :)


This book is genius!! Based on the full-sized (!) paper templates and measurement charts provided, you can trace a basic A-line skirt pattern drafted to fit your size, and then using the directions and photos provided, make a muslin and tweak the seams and darts to fit you like a glove! And then - here's the best part - use that custom fitted pattern to create 17 different variations of the A-line skirt, undeniably the most universally flattering skirt silhouette for all body types. Whoa - yes, please!

One caveat - the pattern templates provided seem to be a tad over-sized. Based on my measurements I should need a size small, but my muslin that size was way too big. I ended up going down about 1.5 sizes to make it fit me correctly. The fitting process didn't really take that long - maybe 2 hours to trace the pattern, cut and sew the muslin, make the adjustments, and then trace a new pattern. And the pattern fitting is the most important step, but you only need to do it once!


I chose a basic black and white small print for my initial attempt at Jona's method. Here you can see the markings I had to trace on my patterns from her paper templates. These skirts require only two pieces - one front and one back each cut on the fold. You cut each of these pieces from your main fabric and also from a lining fabric. The skirt only has two side seams with an invisible zipper sewn in one side.


In this photo you can see my slippery lining fabric (grrr!) sewn to the main skirt fabric at the waist as I'm pressing. I was a little nervous about the invisible zipper insertion, but it went very smoothly and I got it right the first time! Since the fabrics are black and the zipper is black, I couldn't get any decent photos to show you how it looks, but I'll show you more of that when I make the next one :)


Earlier in June I made this blue, 100% linen skirt using my tried-and-true basic skirt pattern from Butterick (read more about it here). I tried a broadcloth poly/cotton blend for the first time as a lining for the blue skirt, and I was very pleased with the ease of cutting and sewing the broadcloth. It doesn't seem to "stick" to the linen fabric either. From the front these two skirts look like they were made from the same pattern.


But from the back, you can see the centered back zipper on the blue skirt.


There are few other differences between the two - the Butterick pattern has two darts in both the front and back, but the Essential pattern has only two back darts. Butterick has a waistband facing, while the Essential has no facing. The jury is still out on which one I prefer, but it seemed much easier to fit the Essential pattern, maybe due to it's heavy paper templates and the photos with directions for making adjustments?

Look for more skirts coming soon - some of the 17 "flirty" variations of "The Essential A-Line" - because I'll be teaching a "Skirt of the Month" series at my LQS this fall based on the book!!

BTW, Jona Giammalva blogs at Stop Staring and Start Sewing. Check it out...

Thursday, August 15, 2013

Rear Window finish

A July finish that is finally photographed! One more quilt off of the UFO list!!

I used the "Rear Window" pattern from Blue Underground Studios and started with a bunch of Amy Butler prints from her early Daisy Chain line. The designer's original quilt was in a trunk show at a local shop a couple of years ago, and I really loved it just as it was, so I tried to use many of the same fabrics.


But of course there are some Kaffe prints in here... Bekah in Green, Paperweight in Sludge (one of my all-time favorites despite the unfortunate color name), and another fabric from his collective that I just can't recall the name of...


All mixed in with some Denyse Schmidt Hope Valley greys and other random teal/turquoise prints. The overall swirly quilting pattern was done by Carol Linder in Hampshire, my go-to long-arm quilter :)


The backing is a mix of two Amy Butler Daisy Chain prints that I scored on clearance at QuiltHome.com - yay! - and the binding is an ombre-like blend of teal, turquoise, and sea glass green that blends well with all those prints in the quilt top.


A close up photo of the backing center section shows off the quilting in sea glass green thread.


And here's a shot of the full backing.


This quilt has seen a lot of use recently by my girls during family movie nights on the couch. Yes, it is summer, and yes, the A/C is usually running, but that hasn't stopped them :) In fact, Thing 1 has decided that we should stop using our lightweight fleece "TV watching" blankets and start using more of "all these pretty quilts".

Monday, August 12, 2013

pillow finish for Alexis

If you follow me on Facebook or Instagram (yes, I caved and put myself on Instagram - and it's been FUN - but more about that another time), you know that last Monday I started an impulse project. While shopping at JoAnn Fabrics recently, I spied some fun orange and navy prints in the Denyse Schmidt collection. That started the wheels turning thinking about our niece, Alexis, who LOVES the University of Illinois sports teams, and the Illini colors are... wait for it... navy and orange!! Since she is leaving for college in a couple of weeks, I decided she needed an orange and navy pillow to coordinate with her navy comforter in her new home away from home.


Now she isn't going to be attending the U of I, but that will not change her love for their teams :) Here's a look at the fabrics I bought, all strip cut and ready to piece...


Using this pattern from the book, Scrap Basket Beauties by Kim Brackett.


Here's what the blocks look like after piecing...


And this is the layout before sewing. Since the blocks are set on point to resemble "X"s, there is some waste from trimming the sides. The end result isn't quite what I had envisioned - it feels to me like the intended design is a little bit lost, and I'm not sure if that is from the dots on navy causing distraction or because the orange fabrics are blending too much. But Thing 1 here at my house assured me that it was "cute" and that Alexis would "love it".


So I added a border of the dots on navy, layered the completed top with some lightweight flannel and a muslin backing, and quilted around the "X"s with an orange thread.


An envelope backing of the navy dots (which is the fabric that first caught my eye and launched the idea!) trimmed with a thin strip of orange print finishes it all off.


I'm happy to report that the pillow is now in the care of it's new owner, and it will be moving to college with her in a couple of weeks :)

Pillow stats: 18" finished. All the fabrics used were designed by Denyse Schmidt and were purchased from JoAnn Fabrics. I used 1/4 yard of each of the four orange prints and 1 yard of the dots on navy.

LinkWithin

Related Posts Plugin for WordPress, Blogger...