Pages

Showing posts with label apparel patterns. Show all posts

Tuesday, October 28, 2014

pattern weights gift set

Here's a great DIY gift idea for the sewing enthusiast in your life - a set of colorful pattern weights!


Thing 1 is doing a LOT of sewing as part of her apparel design courses in college. During my last visit to warm and sunny Savannah, I noticed a jagged broken glass jar candle on an end table in her apartment. She had been using it as a pattern weight, and it slipped off the table. So of course the mom (and avid Pinterest user) in me decided right then that I needed to make her a set of pattern weights :) I got the idea for these no-sew functional and fun weights from this pin.


Supplies needed for this project are:
  • (30) flat 3/4" metal washers from the hardware or home improvement store
  • (5) 15 ft spools of 3/8" grosgrain ribbon
  • high-temp glue gun and glue sticks
Hot-glue the washers into sets of 2 and 3 washers to make 12 pattern weights (you'll end up with 6 of each). One 5 foot length of ribbon will cover a stack of two washers, but a stack of three washers requires about 6 feet. Cut two of the ribbon spools into thirds (5 ft lengths) and cut the other three spools in half (7.5 ft lengths). Use a candle lighter to "melt" the cut ends of the ribbons so they won't fray.


Secure one end of a single ribbon to a washer set with the hot glue and begin wrapping by pulling the ribbon up through the center and around the outer edge overlapping the ribbon as you go. When the washers are completely covered trim the ribbon, melt the cut end, and simply secure it with another small bit of hot glue. Be careful because high-temp glue is very hot. Sorry for the lack of photos of these steps, but all my fingers on both hands were very busy holding the ribbon tight and trying not to get burnt with the hot glue! Depending on the strength and dexterity of your hands and fingers you may want to cover half of the weights one day and save the other half for the next day. My hands were really starting to get sore after covering the first 3 or 4 weights.


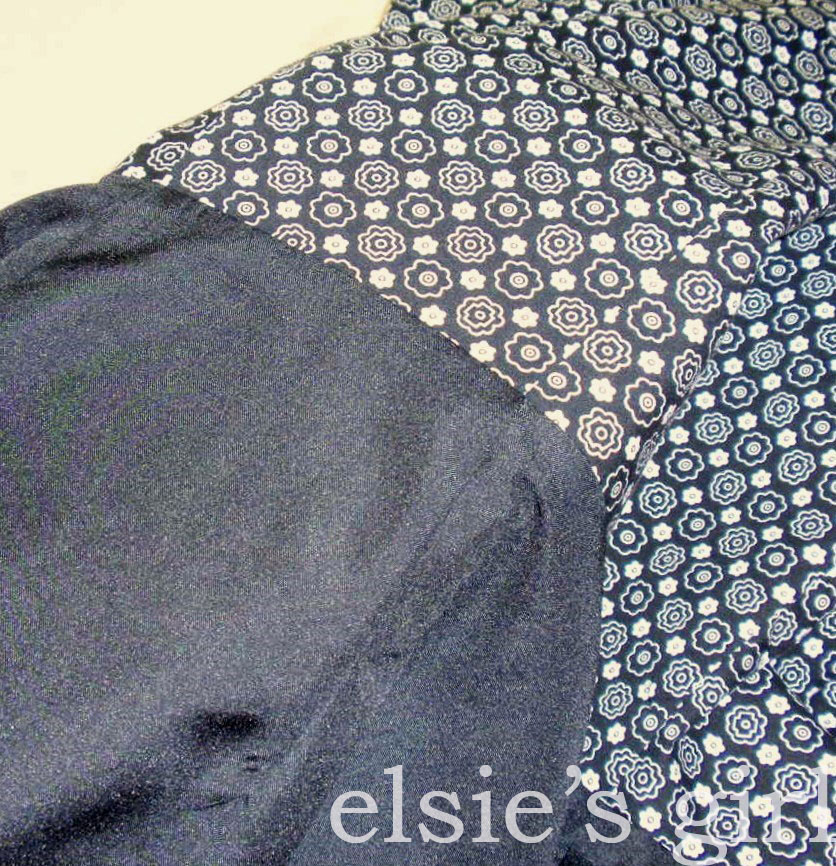
Naturally, cute pattern weights require an equally cute traveling and storage container, so I used these fun fabrics from my stash to make a zipper bag. Both fabrics are from a recent line called "Mama Said Sew" by Sweetwater for Moda - perfect for this project, huh? The darker fabric is printed like a dictionary page with all sorts of fabric and sewing terms defined, while the lighter fabric says, "Sew Sew Sew..." in a script font.


The pattern I used is Amy Butler's "Origami Bag" from her book Amy Butler's Style Stitches. The "mini" size measures 10.5" inches wide across the bag top (7.5" across the bag bottom), 3" deep, and 3.25" high - just right to comfortably hold these weights.


A decorative charm (from the jewelry making department at JoAnns) on the zipper personalizes and finishes it off perfectly!


The weights are getting a lot of use in her sewing studio classes. She loves them and most of her classmates do too. This useful gift was pretty inexpensive to make (about $20 total for the washers and ribbon) and is so very useful for the sewist in your life. Hobby Lobby carries a huge selection of ribbons (other craft retailers do too) so you can make a set to suit every friend's color and style preferences.

And now I think I need to make myself a set!

Wednesday, April 30, 2014

building a summer wardrobe one skirt at a time

Over the past month I've had the great privilege of teaching several ladies in my area how to fit and make their own skirts using the book The Essential A-Line by Jona Giammalva. (You can read my gushing reviews of the book in these previous posts.) To date I've taught two sessions on making the basic skirt and one session on sewing this pleated version...


That glasses fabric! So fun! I started sewing this skirt last fall and nearly had it completed, but then the weather turned so I put it aside. A couple of weeks ago I finished it and decided to make another to refresh my memory on how it was constructed, which yielded this summer fresh version using fabrics from Kate Spain's recent Daydream line for Moda (yep, that's a bathroom mirror selfie you're looking at)...


After sewing all these skirts it feels like I can put the zippers in with my eyes closed. I use a combination of a few different methods I've seen (one day I'll write a handy tutorial), and all of my students have been very pleased with how easy they are to insert.


My skirts on display at the LQS where I've been teaching...


And here is my fabric selection for the next skirt - a tiered version where the blue large floral print will be the main piece and the smaller floral print on white will be the bottom "layer" both separated and hemmed by the fuchsia solid.  The florals are from Iza Pearl's new line Garden Party Tango for Windham Fabrics.


It's possible that I might have enough skirts after that one is complete (possible but not likely!) so I'll be expanding my repertoire and wardrobe by making this Schoolhouse Tunic next...


New clothes for spring - what could be better?! Have you made any new clothing recently?

Wednesday, October 23, 2013

My skirts are (sort of) famous!

My recent skirt sewing binge is featured over at Stop Staring and Start Sewing, the blog of Jona Giammalva, author of "The Essential A-Line", my new favorite skirt sewing book!


bannersquare150

My first class on fitting the pattern and making the basic A-Line skirt will be held on Fridays, November 1 and 15 from 6:00-9:00pm (Parts 1 & 2) at Material Girl Fabric Shop in Crystal Lake. You can stop in the shop or call to register. I hope to see you there!

Wednesday, October 2, 2013

my new favorite fall skirt

Are you tired of seeing photos of my skirt creations yet? I hope not, because after this one I've still got one more to show!

This is a tiered version from The Essential A-Line by Jona Giammalva. The book version has four different fabric tiers, but I've included just two here because I love that main fabric so much.


Fabrics shown are Kaffe's Lotus Leaf in Umber used as the main skirt fabric and his Violets in Ochre used as the bottom tier. I added the Kaffe Shot Cotton in Prune as the bias binding between the fabrics and at the hem.  This one looks fabulous with a lavender tee and jean jacket!


Once again I used a centered back zipper rather than the side invisible zipper shown in the book. These skirts are very easy to make (especially when you've worked the process six times!), but just in case I ever need to alter the sizing, the center back zipper will allow me to take in or let out the side seams to adjust the fit without ripping out the zipper. A side seam invisible zipper is less conducive to alterations.

This skirt is lined with a poly/cotton blend broadcloth and includes a waistband facing, just like many of the others I've made. You can see more of my Essential A-Line skirts and read more details about how I've constructed them by clicking here and here.

Next up for skirts - inverted pleats!

P.S. If you are a local reader, my two-session Essential A-Line basic skirt class will be held on Fridays, November 1 and 15 from 6:00-9:00pm.

Monday, September 23, 2013

these skirts aren't just for summer

These are fall skirts! I've now finished three more skirts using the book The Essential A-Line by Jona Giammalva (previously blogged about here.)


I cannot say enough good things about this book! As you probably know, I love skirts, and this book is by far the best one I've seen to help you make your own fitted pattern that can be varied in so many ways.

The first skirt here is the basic A-Line constructed as directed in the book. It has a side seam invisible zipper and traditional (slippery fabric!) lining. What do you think of that fabric? I can wear ANY color with it! It is called "Effervescence" in Jewel by Robert Kaufman. The fabric is printed with a border running along the selvage on one side, but I was able to cut around that.


Can you see that zipper? No, you cannot, because it is invisible!


Next up is a variation of the basic A-Line. You may recognize this AMH print because I already have another skirt made from it!


This time I changed the pattern from the book to utilize a center-back zipper installation. Since I'm going to be teaching some beginning sewists how to make these skirts, I think a regular centered zipper is far easier to master than an invisible one.


I also added an interfaced waistband facing to this version because I think it helps the skirt to lay better around your middle section.


The lining is a poly/cotton blend broadcloth that is layered together with the main fabric, so it does not hang freely as a traditional skirt lining would. This gives the skirt a bit of a heavier feel (perfect for cooler weather!) while still blocking out any sunshine "see-through".


The hem is encased in a bias binding - one of the hem variations shown in the book. This fabric is one of my all-time favorites: Paperweight in Gypsy by Kaffe Fassett.


And lastly, my version of the book's Patchwork skirt. The author made her patchwork skirt with all 5" squares, but I was inspired by another skirt I saw over the summer made from many different sized cuts of fabrics. I got together with a friend of mine a few weeks ago and we each made one of these skirts (similar but different due to fabric layout) utilizing a shared set of 16 fat quarters. I'll share another post soon with photos of that sewing session - so fun!


Again I added the center-back zipper and waist facing.


And the bias binding hem. This hem fabric is Oval Elements in Licorice by Art Gallery Fabrics.


These three fall beauties are now hanging in the window of my LQS advertising my upcoming November class! I've structured the beginning basic skirt class in two three-hour sessions to be held in the evenings.


Then in 2014 I'm planning to add more classes so students can make some of the book's variations of the basic A-Line skirt. Currently there are two versions on the cutting table in my sewing room - the inverted pleat skirt and the tiered skirt - with a Friday deadline! Must get busy sewing!

Enjoy the week!!

Friday, August 23, 2013

summer skirts

Even though we are down to the last few weeks of summer, I've got a couple of new skirts to show you. This has been my most successful year at attempting a "summer of no shorts". This past spring I came to the realization that I don't like wearing shorts - I know - weird, right? But lately it seems more difficult than it should be to locate a decent-fitting pair that isn't too short or too marmy. Wearing them around the house isn't so bad (and I still do that), but when I'm out and about I just really love a cute skirt. In June my family took a 12 day vacation, and I didn't pack a single pair of shorts, but I did pack and wear several skirts. They're cooler (temperature-wise), girly-er, and waaayyy more fun. And with all the beautiful fabrics available these days, why not make a closet-full of them - a different one to suit your every mood and occasion?

I snagged this book - The Essential A-Line by Jona Giammalva - earlier this summer because I wanted to get some more experience at custom fitting a basic pattern. And yes, the subtitle "Make 17 Flirty Skirts from 1 Basic Pattern" definitely influenced my purchase decision :)


This book is genius!! Based on the full-sized (!) paper templates and measurement charts provided, you can trace a basic A-line skirt pattern drafted to fit your size, and then using the directions and photos provided, make a muslin and tweak the seams and darts to fit you like a glove! And then - here's the best part - use that custom fitted pattern to create 17 different variations of the A-line skirt, undeniably the most universally flattering skirt silhouette for all body types. Whoa - yes, please!

One caveat - the pattern templates provided seem to be a tad over-sized. Based on my measurements I should need a size small, but my muslin that size was way too big. I ended up going down about 1.5 sizes to make it fit me correctly. The fitting process didn't really take that long - maybe 2 hours to trace the pattern, cut and sew the muslin, make the adjustments, and then trace a new pattern. And the pattern fitting is the most important step, but you only need to do it once!


I chose a basic black and white small print for my initial attempt at Jona's method. Here you can see the markings I had to trace on my patterns from her paper templates. These skirts require only two pieces - one front and one back each cut on the fold. You cut each of these pieces from your main fabric and also from a lining fabric. The skirt only has two side seams with an invisible zipper sewn in one side.


In this photo you can see my slippery lining fabric (grrr!) sewn to the main skirt fabric at the waist as I'm pressing. I was a little nervous about the invisible zipper insertion, but it went very smoothly and I got it right the first time! Since the fabrics are black and the zipper is black, I couldn't get any decent photos to show you how it looks, but I'll show you more of that when I make the next one :)


Earlier in June I made this blue, 100% linen skirt using my tried-and-true basic skirt pattern from Butterick (read more about it here). I tried a broadcloth poly/cotton blend for the first time as a lining for the blue skirt, and I was very pleased with the ease of cutting and sewing the broadcloth. It doesn't seem to "stick" to the linen fabric either. From the front these two skirts look like they were made from the same pattern.


But from the back, you can see the centered back zipper on the blue skirt.


There are few other differences between the two - the Butterick pattern has two darts in both the front and back, but the Essential pattern has only two back darts. Butterick has a waistband facing, while the Essential has no facing. The jury is still out on which one I prefer, but it seemed much easier to fit the Essential pattern, maybe due to it's heavy paper templates and the photos with directions for making adjustments?

Look for more skirts coming soon - some of the 17 "flirty" variations of "The Essential A-Line" - because I'll be teaching a "Skirt of the Month" series at my LQS this fall based on the book!!

BTW, Jona Giammalva blogs at Stop Staring and Start Sewing. Check it out...

Friday, April 26, 2013

the Liverpool Tunic

It's finished and looks exactly as I'd hoped!


I ended up cutting the entire garment on the XS lines, and though there are a few things I will tweak the next time I make it (yes - I'm going to do it again!) it fits very well for a first-time-through go at a commercial pattern. How's that for luck?


Things I will tweak next time:
  • Amy's not big on trimming seams, and that is a must-do with this pattern - especially the collar stand.  I've made a note to trim the collar, shoulder/arm, side and sleeve seams.  She tells you to zigzag stitch or serge the edges, but not trim.  Go figure...
  • The bust darts need to be moved up about 1/2" - 3/4".
  • Leave the belt off.  The torso is fitted enough that it's not necessary, and it only adds a big knot in the middle of my back when I sit.
  • Maybe forget about the cuff buttons for the 3/4 sleeve length option.  I don't think they are a really noticeable feature for all the extra work required, and the cuffs aren't that big around to begin with.
  • I'm going to find some decorative buttons for the front.  The self-covered ones are okay, but I can still see a hint of their metallic shine through the fabric.  I thought of interfacing the button fabric first, but I think that would be too bulky.  Anyone else ever tried that or have a better solution?
  • The buttonholes and buttons need to be moved up (toward the collar) about an inch.  They're right on the line of acceptable now without wearing a cami underneath.  I should have tested that before I sewed and cut the buttonholes... live and learn.

I'm planning to use this fabric for my next Liverpool Tunic: Sketchbook in Spring from Amy Butler's Alchemy line.  Very spring-like, huh?


This pattern would also be very cute made up into a long-sleeved fall season tunic of fine wale corduroy or a velvet to pair with leggings. It comes with markings for short, 3/4 and long sleeves, as well as overall length options for shirt, tunic, short dress, and long dress.

An update on Miss Scarlett - sadly, she can never be my exact body double. Her neck and shoulders are a bit too thick and are not adjustable. But the rest of her is adjusted properly and works just fine for skirts :)

Friday, April 5, 2013

adventures in garment fitting

This week I began working on a new apparel sewing project...


The Liverpool Tunic pattern from Amy Butler. Included with the pattern are four hem length and four sleeve length options. I am making the tunic length with 3/4 cuffed sleeves - as shown in the photo on the pattern front. The fabric I chose is from Amy's Alchemy line - Victoriana in Port. I particularly like the spring flower colors against the wine colored background. It should be perfect with jeans!


This is Miss Scarlett. She is my body double; a Christmas gift from my dear husband. On Christmas Day we adjusted all her dials to conform to my particular measurements, and then she stood sentinel in the sewing room until this week when she was called up for active duty - actual garment fitting!


The multitude of measurement charts on the pattern back indicated that I am a size extra-small from the shoulders to the waist, and a size small from the waist down. No problem - I adjusted by cutting accordingly and happily began sewing away. Fast forward to step 6 in the pattern construction directions, and I've got two tunic fronts and one tunic back all full of completed darts and I'm ready to close up shop for the night.

I think, "I'll just pin these pieces to Miss Scarlett and get an idea of how fabulous this garment is going to look when finished!"


But they don't fit - the bodice is too small!! Arrggghhhh!

Now it's time to make dinner, and I'm fuming about how I've wasted all this time and money on a garment that I won't even be able to button! I should have made a muslin first!


The back panel is stretched so tight across both the waist and shoulder areas...


And the front panels are waaaay too tight across the bust. After a very brief mental hissy-fit, I convinced myself that I could let out the darts a bit and take 1/4" instead of 1/2" seams all around, and maybe it would be okay. Tomorrow.


The next morning I'm ready to tackle these fit issues, and I try the pinned garment on myself. Well, what do you know?! It actually fits me! And the bottom half is actually a bit too big. Oh, happy day - I haven't wasted time and money, and I will be able to wear this!

Lesson learned here: After adjusting your dress form to your measurements, take an actual tape measure and confirm that the dress form is in fact your body double. That and yeah, I probably should have made a muslin first.

Miss Scarlett is NOT my body double. But she will be after her dials are re-adjusted, and she then endures a very thorough measuring session. We girls just love measuring sessions, don't we?

Friday, June 29, 2012

can't get it out of my head

This silk dress, specifically...


I have seen the movie "Under The Tuscan Sun" at least ten times. The plot line is pretty good: girl travels to Tuscany in an attempt to ease her heartbreak, impulsively buys a crumbling villa, and subsequently moves there full-time. But the two things that keep me watching over and over again are the lovely scenery and costumes.

I've been in love with this orange/pink silk dress from the first time I saw the film. A couple of weeks ago while channel-surfing, I caught the last 30 minutes of the movie with Diane Lane in that beautiful dress... sigh. It's just so girly and a little bit retro. I love, love, love that dress!


As I was watching it occured to me, why don't I just make myself a dress like that? How hard could it be? Aside from the fact that silk is pretty pricey, what's stopping me?

About 90 minutes from me there is a huge shop called Vogue Fabrics. They carry everything - home dec, wools, silks, cottons, you name it. Their online shop shows several colors of Thai Silk Dupioni, and I particularly LOVE this color called persimmon. Slightly iridescent, the color shifts from orange to pink as the fabric moves and the light changes. Perfect!


I did a little online research about silk fabrics since I've never sewn with them and learned that dupioni silks are woven from two different colors of silk, giving them the iridescent shimmer. Dupioni silks are an excellent choice for dress-making since they are wrinkle resistant and provide a crisp drape. They do have a slight roughness or nubbiness to the weave, which I think gives them a little character. On the downside, though, dupioni silks show pin marks more than other fabrics, so I'd have to be extra careful to keep the pins in the seam allowances.


A close-up shot from the movie shows that Diane Lane's dress has the tiniest little fold-down shawl collar without a notch and set-in sleeves with a fold-up cuff. The dress appears to be a shirt-dress because of the silk covered buttons on the bodice, but they don't continue down the front of the full circle skirt, so there must be a well hidden zipper in the side seam. I'm thinking five yards of silk is what I'll need. Wow - that's a lot of silk!

We've got a family wedding coming up in late September; that should be time enough to act on this obsession, don't you think? Next step is pattern research and a field trip to Vogue fabrics... sounds like fun!

And in case you are thinking I've abandoned my quilty pursuits, let me assure that I've been working on a new baby quilt top in the midst of all this apparel sewing. All the blocks are completed; I've just got to put them together and show you next week!

Happy Weekend, everyone!


Thursday, June 21, 2012

why yes, it IS another skirt

My latest wardrobe addition is another Fat Quarter skirt made using the fabulous tutorial from Venus de Hilo found here.

A photo of my new skirt front...


And one of my new skirt back...


Stephanie (aka Venus) gives you step by step instructions in three installments so you can make your very own drawstring summery skirt from just six fat quarters! I made one last year using her tutorial, so I already had my custom fitted pattern prepared, and the whole thing took me about two hours. Well, maybe three since I decided to sew the drawstring inside-out and turn it with a bodkin. That took a bit longer than I expected - lesson learned - so next time I'll do it the way she told me :)

I've probably got enough fat quarters in my stash to make one of these skirts for every day of the summer season.

So, you might be seeing more of them here.

Just sayin'...

P.S. Fabrics are from the Stockholm line by Robin Zingone for Robert Kaufman.

LinkWithin

Related Posts Plugin for WordPress, Blogger...