Pages

Friday, February 26, 2016

pixelated heart quilt

In the middle of January I became obsessed with making a pixelated heart quilt after seeing a photo of this one made by Amanda at Westwood Acres Fabric Shop.  Though I already have plenty of works-in-progress to keep me occupied, I couldn't seem to let go of the idea.  So...


Just like her quilt, I used 5" cut squares, and I'm happy to report that ALL the fabrics for the quilt top came from my stash.  Lots and lots of Anna Maria Horner prints in this pile - I just grabbed every pink or purple fabric I had and got busy cutting.  The quilt needs 70 colored squares, but I cut 100+ so I could be choosy about where I placed them in the center of the quilt layout to form the heart.


Low volume fabrics make up the background; 215 background squares plus 70 colored squares yield a 67" x 85" (twin sized) finished quilt arranged in a 15 x 19 block grid.


I took all the cut squares to my quilt guild's January sewing day to get the layout set and get most of it sewn together.  I arranged the heart center and sewed it into rows before positioning the background squares.  (Why do all banks have such hideous carpet in their community/meeting rooms?)


I didn't press any seams at the sew-in; I just kept sewing all day to get each row assembled.  Then the following week at home I pressed the seams for each row in alternating directions so they could be nested and all the corners would line up as I completed the quilt top.

Here's a shot of my favorite section of the quilt - the top center of the heart.  I finally cut into and used this french macaron fabric that I've been saving for a few years :)


The print on the right is my backing - Caravan's Light in Sunrise from the Bijoux collection by Bari J for Art Gallery fabrics.


"Dahlia Dance" is the long-arm quilting pattern I selected; it was quilted by my fellow guild member Isis.  The lilac polyester thread (brand name Glide) has a bit of sheen to it, and I love the results!


Pellon Nature's Touch all cotton batting is in the center.  I hadn't used this batting before, but I may be using it exclusively from now on.  It is lightweight with an excellent drape, and after washing the quilt's texture is so soft and crinkly. 


Perfectly sized for a twin bed!


We had a bit of snow here on February 14 - the day I finished binding the quilt - so I had my husband bundle up and hold it for an outside photo.  Great guy, huh?


I started cutting fabrics for this quilt on January 19 and finished the last stitch of binding on February 14.  26 days start to finish - that's a record for me.  Of course the super speedy quilting job by Isis made that possible!

I'd like to make another one of these quilts in the future using smaller squares to yield a lap sized quilt.  Squares cut at 4" would yield a 52" x 66" quilt - perfect for couch snuggling and movie watching :)

I'll let Thing 1 and Thing 2 hash it out over who gets which size ;-)

Many thanks to Amanda at Westwood Acres for her blog post about her beautiful quilt!

Monday, February 22, 2016

selvage spools made easier

The Crystal Lake Modern Quilt Guild is hosting three block lotteries this year, and the first one takes place in April. We chose the Selvage Spools block from this Riley Blake 2013 Block of the Month program.  You can download and print the Riley Blake block directions here, but you'll probably want to keep reading to discover an easier way to make this block.


The block is composed of four 6" spools to finish at 12" square (12.5" unfinished).

The original pattern uses a template and partial seams - no thank you.  When Lorrie and I met earlier this week to sew the sample blocks for our Sunday guild meeting I made some quick pattern modifications to make it easier.  Easier = Better, am I right?!  Here is my pattern tester block - spot on at 6.5" unfinished :)


I created this tutorial a little differently by adding text to each photo of the steps.  I hope you'll find this easier to follow :)

The materials you'll need for one block:

Using a pencil lightly mark a diagonal line on the wrong side of each 2" square.
Choose selvages with fun words and lots of color dots!


The sewing instructions begin here:

You'll want to center the wording/color dots on the background square.

I sewed this piece about 1/8" from the bottom of the background square so the words wouldn't be cut off later in a seam allowance.

You can choose to cover the printed fabric area of the first selvage or not.

We used 6-7 selvages per spool.


Press these seams toward the background fabric.

Make sure you carefully place the marked diagonal lines as shown.


Press away from the center.
Your spool block should measure 6.5" square now. 


These final seams are all pressed toward the spool end - not the background fabric.


And there you have it - a 12" square finished selvage spool block!


Thanks to Riley Blake for the original pattern and inspiration for this fun quilt block!

Monday, February 15, 2016

valentine pillows

Every year after the Christmas holiday is over and all the decorations are packed away, I find myself in the same spot - no seasonally appropriate pretty pillows to replace the Christmas ones.


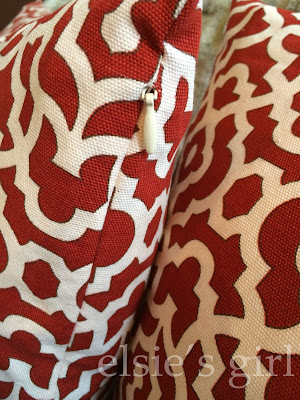
Last week I finally remedied that problem by whipping up these three fun pillows using home dec weight fabric purchased at WalMart...WalMart!!

I'm not a big fan of that particular retail company, but when I saw Jona Giammalva's recent Periscope about her fabric score at her local superstore, I decided to give it a try.  My local store had this great red geometric print for $3.97 per yard. What?!  And the ticking stripe was $6.97 per yard!

A couple of yards of fabric, three zippers, and two hours of cutting and sewing later, I had three great new pillows for my family room :)


Jona's recent blog post about her new heart applique pillow will give you all the tips and tricks for making your own, and she has a great tutorial on how to insert an invisible zipper into the side seam of your pillow covers.  Check it out - it's easy and foolproof!


The red pillows are 20" square, and the heart pillow is 18" square.  Seriously, this project could not have been any easier. 


Thanks for the terrific tips and tutorials, Jona!!

Friday, February 5, 2016

mystery medallion 2016

The Crystal Lake Modern Quilt Guild is sponsoring a new challenge this year - a Mystery Medallion program where we each create a quilt center block of any size to start and add a border each month for the next five months. The fun (or challenging) part is that no one knows what the requirements for each of the five borders will be; they are revealed month by month. So no planning or scheming ahead of time - just jump in and make it work each month!

My quilt center is an English Paper Pieced (EPP) star on a background of "made fabric" (a bunch of low volume scraps sewn together), and it measures 22.5" square.  The star is machine appliqued to the background with a short straight stitch around the outside edge.


The background fabrics were left over from blocks I made for a quilt shop sample in 2014; it hung there as a sample for quilt kits they were selling, and after that I'm not sure where it ended up. The "plus" blocks were made from a pattern found here.  I really did love it, so one day soon I'll have to make another and keep it for myself (adds yet another project to the much too long already project list.)


The hexagons in my quilt center were made even before 2014 when I was first learning how to EPP one spring break vacation in Florida. I was never sure what to do with them, and at one point they were sewn together in rows. Maybe I was planning to put them on some pillows? Who knows!


But sometime last year I saw a photo of a star made from hexagons so I took the rows apart, and sewed them into the large star shape composed of 73 hexagons. So the star and the background piece have been hanging around on the design wall for quite some time just waiting to be used in a project.

The whole point of a Mystery Medallion Challenge is to let go of control and practice your design and color skills each month when the new border requirements are revealed. At our meeting last weekend we learned that January's border must include snowball blocks and use the color red violet.

RED VIOLET?! Sweet - one of my favorite colors, and I happen to have lots of it in my stash.  I gathered a few fat quarters that were primarily red violet, tossed in a couple more that were primarily yellow (but still contained pink/violet), added a stack of more low volume scraps, and started cutting.


Since my center square measured 22.5" I needed to add a "spacer" border to increase the size to 24.5" in order to accommodate the 4" snowball blocks I planned.  This Peppered Cotton in Fog by Studio E has just enough contrast to set it apart from the backgrounds, but it doesn't overwhelm and grab all the attention.  It was cut at 1.5" width to finish at 1".


The 28 snowball blocks are each 4" finished, so now the quilt center measures 32.5".  I cut each center of the snowballs at 4.5" square and each corner background fabric at 1.75" square.  You can find a handy tutorial for making snowball blocks here.  Mine look more like stop signs (I probably should have made the corner pieces smaller) but whatever - I love how it's turned out!


Even if you aren't a member of CLMQG, you can follow along and make your own Mystery Medallion quilt.  Each month the new border requirements will be posted on our website, and photos of members' progress can be found on our Facebook page.

Wednesday, February 3, 2016

gift sewing - Tessa Basket

It's so much fun making gifts for others! Early in January I made this cute tote bag for a sewing friend who has made several amazing gifts for me over the years. The gift-giving bar has been set pretty high by her, but I feel like I met the standard with this bag - it turned out so great I almost didn't want to give it away. But her reaction upon opening it made me so glad I did :)


I used the "Tessa Basket" pattern by Pink Stitches available here as a PDF download and Amy Sinibaldi's (of NanaCompany) version as my inspiration.

The fabrics used in my version are an eclectic mix of Cotton & Steel prints, Hobby Lobby quilting cottons, and a charcoal grey shot cotton from Studio E's Peppered Cotton line.


The pattern doesn't provide exact cutting or finished dimensions for the bag, but I knew I wanted it to be a good sized tote that could carry a lot of sewing supplies :)  I cut a few strips from 15 different fat quarters in widths varying from 1.75" to 3" and then strip pieced them into two panels each approximately 18" wide by 13" long.  The 5.5" x 18" charcoal shot cotton was then sewn across the bottom perpendicular to the print strips making the entire panel about 18" square.

After using Spray n Bond to glue baste a layer of muslin and lightweight cotton batting to each bag panel (layered just like a quilt "sandwich"), I quilted them with random straight lines in a medium grey thread.  The panels were then trimmed to 17" wide by 18" long before using the pattern template to cut the top curves that later accommodate the straps/handles.


Bag construction was fairly typical - sewing the sides and bottom then making a boxed bottom with a diagonal seam at the corners.  The finished bag dimensions are approximately 12" wide x 13" tall (excluding straps) x 5" deep. 


I'm showing both sides of the bag so you can better view the placement and different widths of the fabrics I used.


The Tessa Basket pattern calls for cutting the 1" wide cotton webbing straps to a length of 11".  I like bag straps long enough to comfortably wear over my shoulder, so I cut the webbing for this bag at 16" per strap.


Don't you love this cotton webbing with the running stitch accent on the sides?!


The bag interior is no frills (meaning no pockets or zippers) in a fun feather print cotton available at Hobby Lobby.


When I make this pattern again I'll add some pockets to the interior and possibly use a lightweight interfacing on the lining fabric to give it more heft.  This version stands upright easily on its own; I think the lightweight batting worked well due to the density of quilting on the exterior.  If you want to do less quilting I believe you could replace the muslin with a layer of mid-weight fusible interfacing to provide the same level of stability to your finished bag.

A Google search on "tessa basket" reveals many images and links to other bloggers' reviews of this pattern.  Because you can use any combination of fabrics and cut them any size you wish to make the panels, this pattern is easily customized and can yield an infinite variety of one-of-a-kind bags.

LinkWithin

Related Posts Plugin for WordPress, Blogger...