Pages

Showing posts with label home decor. Show all posts

Monday, February 15, 2016

valentine pillows

Every year after the Christmas holiday is over and all the decorations are packed away, I find myself in the same spot - no seasonally appropriate pretty pillows to replace the Christmas ones.


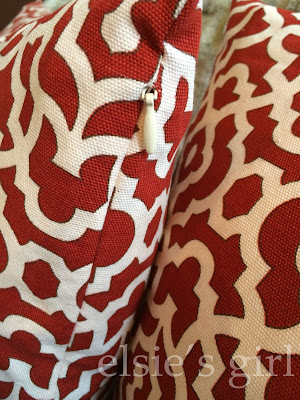
Last week I finally remedied that problem by whipping up these three fun pillows using home dec weight fabric purchased at WalMart...WalMart!!

I'm not a big fan of that particular retail company, but when I saw Jona Giammalva's recent Periscope about her fabric score at her local superstore, I decided to give it a try.  My local store had this great red geometric print for $3.97 per yard. What?!  And the ticking stripe was $6.97 per yard!

A couple of yards of fabric, three zippers, and two hours of cutting and sewing later, I had three great new pillows for my family room :)


Jona's recent blog post about her new heart applique pillow will give you all the tips and tricks for making your own, and she has a great tutorial on how to insert an invisible zipper into the side seam of your pillow covers.  Check it out - it's easy and foolproof!


The red pillows are 20" square, and the heart pillow is 18" square.  Seriously, this project could not have been any easier. 


Thanks for the terrific tips and tutorials, Jona!!

Friday, September 19, 2014

college apartment pillows - part 2

I'm finally back to finish reporting on the college apartment pillows that I helped Thing 1 make last month.  The round pillow was made using an Amy Butler pattern, and you can read more details about the construction of that one here.  But today I want to tell you about the other four pillows we made.  I did most of the cutting, and Thing 1 did ALL of the sewing.


The two square pillows were sewn with home dec weight fabric we found at JoAnns.  Each of these 27" floor pillows has a beige hemp piping/welting trim around its outer edge.  The inserted pillow forms have a box edge instead of the usual knife edge, so the covers are well stuffed - just the way you want a floor pillow!


They also have concealed zipper flaps on the back to hide the zippers and prevent scratching either the floors or people sitting on them :)


In this photo you can see the standard 22" zipper beneath the flap.  I always use this tutorial for placing a lapped zipper on the back side of a pillow - it has several photos and excellent directions that guide you through the entire process.


The two lumbar pillows each measure 14" x 28" and are also made using a home dec weight fabric from JoAnns.  I liked this fabric so much that I bought extra yardage to re-cover the cushions on a rocking chair here at my own house!


Thing 1 decided to sew invisible zippers into the 14" ends of these two pillows.  She's a zipper pro!


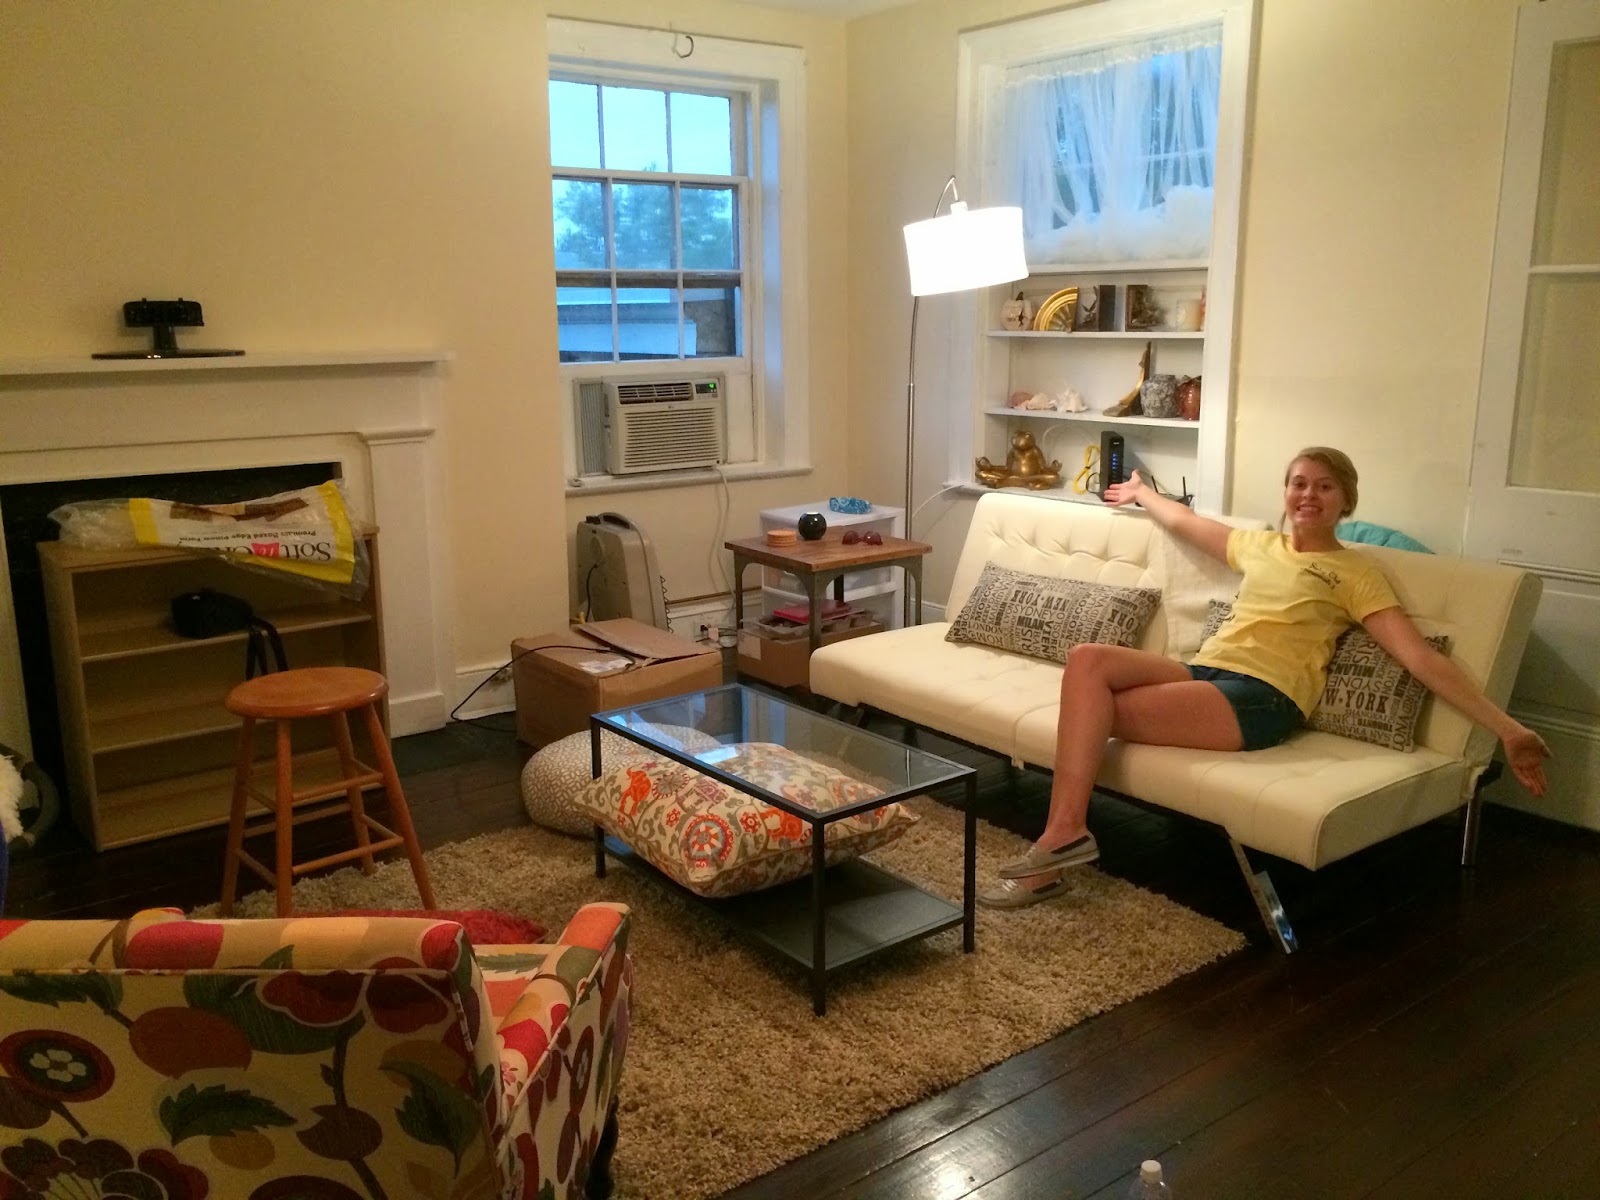
All of these gorgeous pillows are now decorating Thing 1's college apartment.  Needless to say it's a very stylish first apartment.  This photo was taken at the end of two days of non-stop painting and moving furniture.  A lot more decorating has happened since then, but you get the general idea.


Here we are outside the building which dates from 1850.  It's on an all brick street with brick sidewalks - very charming :)


Currently I have a cut of home dec weight fabric just waiting to be made into another HoneyBun Pouf pillow for a class sample.  It's on the top of the project pile so it stands a decent chance of completion before the year ends ;-)

Enjoy your weekend!

Friday, August 29, 2014

college apartment pillows

It's been a fun summer with little bits of sewing here and there, but last week was VERY productive! Thing 1 is preparing to move into her first apartment at college, and she needs some fun pillows to decorate her new space. She did most of the sewing, I did most of the cutting, and with a few days of  intense work she has three new seriously stylish floor pillows...


And two lumbar pillows for the couch/futon!


I'm going to dive right into the "how-to" for the most difficult pillow - the 24" round Honey Bun Pouf pillow made from Amy Butler's pattern in this fun geometric print we found in the Home Dec section at JoAnn's. The pattern calls for 2 1/8th yards of 54" decorator weight fabric for the 24" size, but even after careful fussy cutting to match the print I still have 3/4 yard leftover. That seems an excessive amount of extra fabric, but I guess that just means a few more toss pillows :)

The pattern also gives directions for constructing the pillow with quilting weight cottons, but you need to back each pillow segment with heavier weight cotton canvas to provide the required sturdiness and weight for a floor pillow. In my opinion the home dec weight was perfect - not too bulky to work with , one less construction step, and the finished product feels durable.


First step - trace the wedge template provided with the pattern. I made 5 pattern tracings on freezer paper so I could iron the patterns to the fabric for easy cutting without pinning. 30 total wedges are needed to make the pillow - yikes!


Mark your pattern pieces with information from the pattern. This is an OCD type habit that I have, but it has saved me from making cutting mistakes several times. The information also helps if your patterns get separated from the instructions, and you find them two years later and wonder "what the heck are these?!" Ask me how I know this ;) The center of the pattern outer edge is marked to help me with the fussy cutting.


Since this geometric print is a mirror image from left to right and top to bottom I was able to stagger the pattern pieces across the fabric this way. I could fit my 5 wedge patterns across 26" - half the width of this decorator fabric - so 10 would fit across one complete width selvage to selvage. If your fabric has no specific pattern you want to match in cutting, then you could cut two layers at a time. But since I wanted (needed!) to match the fabric pattern, I cut each wedge individually. And notice no pins! Freezer paper is fabulous for patterns like this!


Each wedge is backed with a layer of lightweight cotton batting, which means you need to cut 30 pieces of batting using the wedge pattern.  The pattern supply list includes a twin sized batting, but that seems an excessive amount.  I can't say for sure the actual quantity needed since I used my scraps, but it seems to me a throw size (60" square) for the 24" pillow will be sufficient. The lightest weight cotton batting is what you want. Anything with more weight and bulk is going to give you problems sewing. Quilter's Dream Request batting (the blue label) is a good choice.


The batting is basted to each wedge section and then trimmed away to very near the basting stitches - by far the most tedious step of the process. The pillow top and bottom are sewn into three segments of five wedges with all seams pressed in the same direction. Here is one completed segment - 1/3 of the pillow top.


And here is the completed top. That fussy cutting was totally worth the extra time, right?!


The underside of the pillow top shows how the seams all spiral in the same direction. Loops of twill tape are sewn to the center of the top and bottom to achieve the tufting effect. I initially questioned the necessity of this step thinking I could just use a long upholstery needle to attach the buttons at the end after stuffing, but this method is genius.  Do it this way!


A 12" zipper provides the side seam opening for stuffing. Inserting this zipper was easy peasy. I was anticipating much more difficulty because of all the fabric bulk, but it went very smoothly.


Two self-covered 2.5" diameter buttons and 4 pounds of fiberfill stuffing completes the pillow.  None of the local sewing supply shops had this size button kit in stock so I ordered them from amazon.


The medallion motifs were fussy cut from fabric that we used on another pillow - they were the perfect size!


Since this is such a lengthy and photo-heavy post, I'm going to save the details about the other four pillows for the next post.

I hope you all have enjoyed your summer as much as I have - with the exception of the rotary cutter incident of course!  Here's to a great fall season.  Back to school and back to sewing!!

Are there any other Honey Bun Pouf pillow makers out there?

Thursday, March 6, 2014

seaside pillows finished

The seaside pillows for my SIL's school auction are finished and on their way to her!

I quilted each of the 16" pillow tops in an overall loopy pattern with a medium blue thread.


Monday, November 25, 2013

one last fall project

In my house there are no Christmas decorations allowed until after Thanksgiving, so I've still got a few days left to enjoy this scrappy pumpkin...


Pumpkin fabrics: Lots of 2.5" squares of Kaffe, a little AMH, some Tula Pink, and some Michael Miller, swapped and shared from stash with my friend Andrea. Background: Kona Taupe (I think).


Quilting: outline/echo straight-line stitches in taupe using the even-feed foot on the background, and free-motion contouring in an orange variegated King Tut thread on the pumpkin.


Backing: An out-of-print Kaffe Fassett fabric called "Fans". Binding: Kaffe "Exotic Warm Woven Stripe", also from the stash!


Final measurements: 16.5" wide x 15.5" high. A hanging sleeve on the back holds a very small dowel rod that slips right into a pair of little 3M hooks mounted on my kitchen pantry door.

Given the small size of this project I didn't make use of a huge quantity of scraps, but the only thing I had to purchase was the background. In fact, now I've got even more scraps because Andrea and I just cut and cut and cut orange squares for an entire afternoon, not really paying attention to how many we might use. We've each got enough squares cut for 3 or 4 of these projects! My excess squares have been neatly tucked away in the 2.5" square bin for next year - maybe they'll become some fall-themed trivets using Insul-Brite as the batting?

Friday, November 8, 2013

everlasting pumpkins for fabric lovers

Christmas ads are already inundating us, but there are still a few weeks of fall remaining. Plenty of time for you to make a batch of these pumpkins to decorate your home for Thanksgiving.


I made these three last weekend, and it took me about one hour per pumpkin - a great way to spend a Saturday afternoon. The project will go even faster if you've got a willing crafty helper :)

You can find these carve-able pumpkins at JoAnns, Hobby Lobby, Michaels, and most chain craft stores. You'll also need fabric scraps, matte finish Mod Podge, and a foam brush.


I cut my fabric scraps into roughly 3" squares. I cut them with scissors, eye-balling the dimensions. No need for precision cutting on this project!

Beginning near them stem, brush a swipe of Mod Podge larger than your fabric square on the pumpkin. Place the fabric square on top of the Mod Podge, tamp it down, and then brush another layer of Mod Podge over the top of the fabric square.


Continue this process - layer of glue, fabric, glue over the fabric - down the side of the pumpkin, overlapping the fabric edges as you go.


Yes - this is my mostly Kaffe (and friends) pumpkin!


When you get to the bottom of the pumpkin with a "column" of fabric, start working your way back up to the stem. Continue until you have the entire pumpkin surface covered with fabric.


Check for any edges that may have lifted and re-glue them with another swipe of Mod Podge. Then you just have to wait for them to dry - usually only a couple of hours.


Now you've got some everlasting pumpkins to decorate your home. I've displayed mine on the fireplace hearth, but the outside photos are so much prettier!


You could cut your fabric scraps into any shape - rectangles, triangles, circles, diamonds - go crazy and have fun!

Next year I want to cover some white pumpkins with large dots of black and grey fabrics. What do you think?

Monday, November 4, 2013

snowflake pillows finished

The holiday snowflake pillows are completed and on display at my LQS. Here's a shot of the two pillow fronts and the little info cards I made to attach to each one.


The pattern called for the pillow backs to be closed with seven buttons. While I loved the look of the buttons in the pattern book photos, I didn't think that a button closure was the best option for a few reasons:
  1. that's a lot of buttonholes to sew
  2. all my buttons were different sizes so I'd need to recalibrate the buttonhole attachment frequently
  3. I didn't want the pillow backs to look like when a guy wears a too-tight shirt and the buttons are just barely keep everything contained


So I put a zipper under the buttonhole flap instead!


Now the backs are all smooth and pretty with just five decorative buttons each.


You can read more about the construction of these pillows here. The pattern I used can be found in Amanda Murphy's new book, Modern Holiday.

Tuesday, October 29, 2013

snowflake applique pillows

I've found some Christmas spirit and started working on a couple of Christmas pillows for display at my LQS, Material Girl in Crystal Lake, IL.


The pattern I used is called "Snowflake Pillows", and it can be found in the new book, Modern Holiday by Amanda Murphy. This book is full of fun quilted projects you can make to decorate your home during the holiday season. I want to make all of the pillow patterns, as well as most of the quilts. You should definitely check out this book!


I traced the four unique snowflake patterns from the book onto Heat n Bond Lite, then fused them first to a Basic Grey Grunge fabric in white. I trimmed around the snowflake shapes and then fused then to my pillow fronts - four different snowflakes per pillow. Tiny zigzag stitches in matching thread cover the raw edges of the applique pieces and protect them from fraying.

Both of my pillows are made using the 2013 Basic Grey holiday line called "Aspen Frost". The first has a blue Grunge accent with nutcrackers and tree ornaments...


While the second pillow has a green Grunge accent with poinsettia flowers and pine needles. The buttons are for the pillow backs - I have quite a few mismatched deep red buttons of varying sizes from 3/4" to 1" that I plan to use to give each pillow a unique look, rather than purchasing new buttons that all match.


Each snowflake is centered on a 4.5" finished square, and the finished pillow will hold a 12" x 16" insert.


I quilted the green trimmed pillow with horizontal wavy lines on both the trim and main body pieces. The snowflake squares are not quilted because I appliqued through all the pillow front layers - pillow top, pre-washed flannel, and muslin backing.


The blue trimmed pillow is quilted with swirls - my favorite! - on the trim and main body pieces.


I'll show you the backings and completed pillows soon. I'm anxious to finish these and get them to the shop for display!

Thursday, October 4, 2012

fall placemats

This work-in-progress can finally be checked off the list, and there's still plenty of fall left to enjoy them :)

Last fall Thing 2 decided we needed some season appropriate placemats, and since she was fresh off of her table runner finish (see it here) she decided to use the same pattern for our placemats.


Luckily I had a bundle of autumn-hued Anthology fat quarters just waiting to be cut up and used. We dug through the stash and found a few others to coordinate, and she went to town cutting 3" x 18.5" strips - enough to make four placemats. She finished two of them last year, and then schoolwork and life in general got busy and the other two were just put aside.

Time flies and here it is fall again already! I discovered the unfinished pile a couple of weeks ago while on a straightening and organizing binge, and decided that we needed six rather than just four (I hate when you've got a guest or two and all the placemats don't match or even remotely coordinate. OCD? Yes!)

So a few more strips cut and sewn, some simple straight-line quilting, and now we've got a coordinated set of six fall placemats :) You can see that the strips were just sewn together randomly to avoid a matchy-matchy look.


They are backed with this large fall floral Anthology print.


And since they will see lots of time in the wash cycle, the binding is machine-stitched for extra durability. In an uncharacteristic burst of "use what you already have on hand and just finish it already" motivation, two different bindings were used!

You can look here to see my method for machine binding.


Finished measurement: 11.5" height x 18" width. Very simple and quick!


LinkWithin

Related Posts Plugin for WordPress, Blogger...