Pages

Monday, February 27, 2012

Dotty Star borders

Over the weekend I chose a new layout for my nine Dotty Star blocks. The layout I posted last week felt like there was too much blue and not enough yellow. But this new one feels more sunny overall :)


The borders were cut and placed to correspond with the main color of each block. So now with the 3" border all around, my quilt top size is 60" x 60".


I purchased a black with white dots fabric last week for the binding, so now I've just got to find a backing and decide how to quilt it. I'm pretty set on sending it out to be quilted, but I'm not sure if I'll have her do an all-over pattern or something more custom. The quilt photographed with the pattern has the stars ditch-quilted with various circular motifs quilted in the background square spaces. Any suggestions for me?

Friday, February 24, 2012

9 out of 9 finished!

I am just floored by what can be accomplished when I stick to one project at a time! This week I managed to crank out the last five of my Dotty Stars, and here they all are together on the design wall...


I'm not sure if this will be the final layout; the borders need to be cut and placed around the perimeter before I decide for sure. I've got a close-up shot of each of the five new blocks for you next, but be sure to scroll all the way to the end of this post for some helpful tips should you decide to make your own Dotty Stars quilt!


Tips and Tricks for making your own Dotty Stars Quilt

Nine stars provides quite a bit of practice, so I made a few notes to help you with yours :)

1. I am a big believer in Mary Ellen's Best Press spray. There are tons of bias edges in these quilt blocks, so do yourself a favor and stabilize all that fabric with Best Press or another starch-like product before cutting anything.

2. Make it easy on yourself and just cut a mess of your scraps into 3" squares. You'll need a ridiculous amount of HSTs cut from 3" squares to make this quilt.


3. For each star you'll need 28 dark HSTs and 20 light HSTs cut from your 3" squares, and 9 total 2.5" squares - 5 dark and 4 light. Cut these center squares from your pile of 3" squares after you've made the triangle sections.


4. Add some yellow to each block to pull everything together in the end. I wish I had added some black and white to each one as well - I think it would have given more contrast within each star.

5. When sewing your small triangle units (the point sections of each star) use the full 1/4" seam allowance, but when sewing the center four patches use a scant 1/4" seam. The first couple of blocks my pieced triangle sections were always bigger than the 4 squares at the corners and the center 9 nine patch; the only way I could fix this (since all my corner squares were already cut) was to vary the seam allowance slightly between the triangle and square sections.

6. When sewing the main nine sections of each star block together, press those seams open. For all other seams within the block sections, press according to the pattern instructions.

I used all scrap fabrics for the colored portions of each star, but I did purchase 12 different 1/4 yard cuts of dots on white to use for the backgrounds. It doesn't seem like I used up that many of my scraps. My friend Lorrie thinks that scraps multiply once you start cutting them, and it sure seems that way here. I feel like I've still got enough HSTs cut to make another quilt. What should I do with them? It's so hard to throw away perfectly good fabrics! Maybe I'll make something like this or this with the leftovers?

But there I go again getting ahead of myself. Borders on this one first, Shelley, borders on this one first!

Friday, February 17, 2012

pink and red Dotty Stars

I cranked out two more Dotty Stars this week! Pink and red for Valentine's Day :)


I wish I could tell you that the time to make each block has significantly decreased, but that just isn't so. Maybe I'm down to 2.5 hours each, but the cutting just takes forever!

Note the cupcake and french words fabric in the center squares of this pink block :)


Can you find the fried eggs and Mary Engelbreit cherries in this red one?


It's been so fun to revisit old favorite fabrics while making these blocks. Even the littlest triangle reminds me of something else I've enjoyed sewing.

Progress so far - 4 down, 5 to go!


The pattern is available for free download from the Better Homes and Gardens All People Quilt site here. C'mon, you know you wanna make some, too!

Thursday, February 16, 2012

trés excellent

Thing 2 recently made a new cover for her Nook e-reader. It's the newer, smaller version of the Nook, so the original New York themed cover that she made doesn't fit (too bad because it is so cute and well made!) But this one is even better!


C'est magnifique! She altered the Atkinson Reader Wrap pattern to this Nook's smaller size by cutting the pattern pieces 7.75" high instead of 8.5" indicated in the pattern. An easy change that you can make too if you've got a newer Nook and this pattern handy. She also used four pieces of elastic headband to hold the reader in place since the pocket on the original interfered with the touch screen. The coordinating zip pouch to hold the charging cord was made using the Atkinson Ca$h and Carry Pocket Zip pattern.


The fabrics are from my stash; so fun and fitting for this point in her life. She's become a bit of a Francophile thanks to a golden birthday trip to Paris, French language lessons at school, and movies her parents repeatedly watch such as "Midnight in Paris", "A Good Year", "Julie and Julia", "Chocolat"... the list goes on and on.


The fabrics were originally from my friend Vicki's stash but came into my hands via her fabric de-stashing "garage sale". Thanks, Vicki!


Thing 2 has also recently expanded into the blogging world with a fellow Francophile student at eiffelinlouvrewithfrance.blogspot.com. They've got a list of over 100 fun, French topics planned to share! If you stop over, leave her a comment telling her that her maman sent you :) Merci beaucoup mon ami!

Tuesday, February 14, 2012

orange Dotty Star

I love to have several projects going at once so when I'm bored with one, I can move on to another for a couple of days. But right now there are so many things in progress that the piles are starting to bother even me!

One thing I did manage to finish last week is this orange Dotty Star. Even though it seems to take forever to cut all the pieces for one block, I just love how they are turning out!


I added a lot of yellow and a little bit of pink to liven it up, and I think I'll use that same strategy for the rest of the blocks. A little yellow always makes things more cheerful!


Don't they look great as a pair? Two down, seven to go. Little half-square triangles are piling up everywhere!

Tuesday, February 7, 2012

my map wall

A friend of mine recently encouraged me to post a photo of my "map wall" from my home office on Pinterest. The map wall has actually been "up" for about five years now, but apparently I've never posted about it. Shame on me - it's probably my most favorite feature in my home!


My original inspiration was a photo in a magazine from several years ago that showed exactly this - a wall covered in maps - although the magazine photo had maps that appeared to be antique and yellowed from age. I was absolutely smitten with it and couldn't stop thinking about it.


Here's the part where I tell you (again) how fantastic my husband is, and how he always "buys my chairs". (from "Phenomenon" with John Travolta - a must-see if only to understand this reference.) The home we live in came with an office painted in what I'll graciously refer to as "a remarkably ugly" decorating treatment. The walls were a dark green faux-leather finish (seriously?) with a wallpaper border where wall and ceiling meet and another border on the ceiling with mitered corners giving the (poor) impression of a tray ceiling. My husband agreed to replace it with the map wall!


So we collected maps for a couple of years from friends, family, and our National Geographic subscription until we had enough compatibly colored ones to fill the 12' by 8' wall.

The walls had to be sanded a bit to remove the faux-leather texture, and then we re-painted them a soft green-blue hue to coordinate with the maps. We first covered the map wall with a wallpaper-like primer. It is purchased in rolls and applied to the wall much like wallpaper with paste, and it will allow any future owners of the home to more easily remove the maps if they (for some odd, inexplicable reason) don't find this wall quite as fantastic as we do. The white background in the photo below is this blank wallpaper:


We first taped up the maps we liked (giving prime viewing space to locations we'd actually visited) in overlapping layers to determine their final placement and diagrammed their locations and the order that they needed to be applied. Then following our sequence of layering, applied wallpaper paste to one area at a time:


Placed each map over its "glue spot":


Checked to be sure it was level, and then smoothed it out to remove any bubbles and as many wrinkles as possible. Most of the time when I use the word "we" here it really means "he" as in my husband. He did 90% of the gluing and placing and smoothing, and he really deserves all the credit for this beautiful room :)


We use our old dining table as the desk in this room since it's large enough to accommodate a computer on each side, and because of that two people can work comfortably at the same time. To round out the travel theme, I arranged a bunch of destination postcards (another collecting obsession of mine) that I had purchased over the years across the desk top, and covered that with a custom cut piece of glass.


There are postcards from England, Italy, France, Spain, Austria, US National Parks, art museums, Washington DC, Hawaii, California, Michigan, Wisconsin, and good old Illinois.


Five years later and I still love this room - one of the best decorating decisions I've ever made. And now you know what I'm looking at each time I sit down to write a post or upload a photo :)

Monday, February 6, 2012

it sounds too good to be true...

But it really isn't! Meet the latest tool to help you easily mark quilting lines - the Frixion Pen by Pilot.


It comes in range of colors (black, blue, red, purple, orange, fuchsia, etc) and was originally designed for crossword and sudoku puzzle enthusiasts who wanted an erasable pen. Yes, it is erasable on paper, but even better for quilters, it 
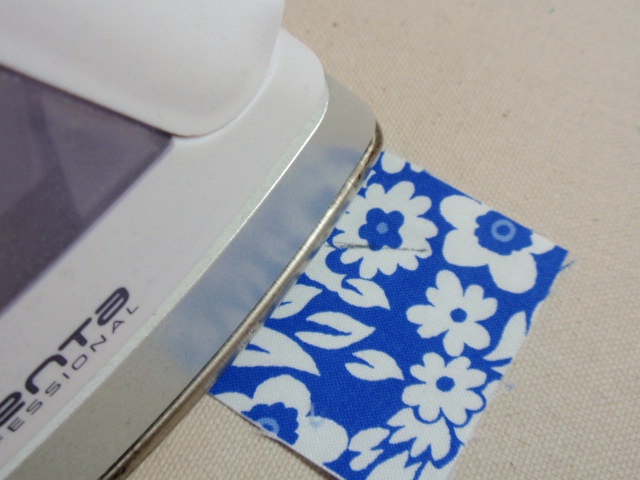
disappears from fabric when touched with a hot iron! Here I have marked a swatch of my latest project with a black Frixion pen:


Touching it with a hot iron:


and "TA-DA", the black marking is gone!


As with any marking tool, it's best to test it on all your fabrics before making a full commitment to using it somewhere that may cause you great anguish if it, in fact, cannot be removed. In these next two shots, I've marked all my fabrics with the pen to test it:


And now after ironing, the black marking is gone.


You can see a slight bit of white residue on the darkest fabric, but since I'm going to mark quilting lines that will be stitched on, that bit of white is just fine with me.


I used the black pen to mark all the quilting lines on this project, and I'm happy to report that after quilting, all the marks did indeed disappear, and I cannot find any traces of residue :)


DISCLAIMER: Some of my LQS customers did report having problems with these pens not removing from batik fabrics. So even though I already said it, I'll say it again. Make sure you test it first! The pens are probably available at your LQS, but if you can't find them there, try an office supply store like Office Max or Office Depot. The pens I tested were sort of like a very fine felt-tip; I know there are others being sold that resemble a highlighting marker in color and appearance, and I can't speak to how well those work. But those "felt-tips"? Well, I've got one in every color now!

Oh, and another thing you should know - if the project you've erased the markings from is exposed to cold temperatures (say the freezer or your cold car sitting outside overnight) the markings will come back! You can still remove them again with a hot iron, but I'm just letting you know :) I'm sure you don't routinely put your quilts in your freezer, but I'd hate for you to load up your car with a precious wedding or baby shower quilt gift in some freezing cold weather, only to discover that those black markings have re-appeared as the bride/mom-to-be opens your one-of-a-kind gift. Be prepared!

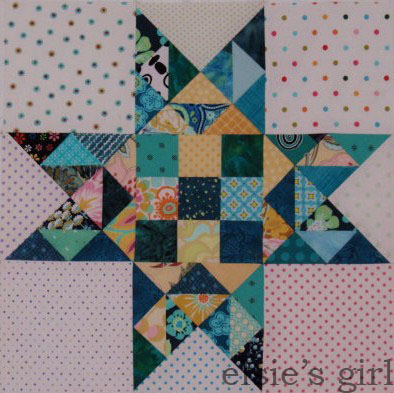
And just in case you're wondering, this is the quilt top that I was working on while testing the pens. It's called "Breakfast Blues", and it's the February Breakfast Club II project I'm teaching at my LQS :)

LinkWithin

Related Posts Plugin for WordPress, Blogger...