Pages

Showing posts with label Christmas. Show all posts

Wednesday, April 13, 2016

modern building blocks 2, 3, and an outsider

Continuing my earlier post documenting my Modern Building Blocks quilt, I've got three more large quilt blocks to show you.  The published pattern includes only one 30" block, but my king-sized layout requires two, so I enlarged a block from Love Patchwork and Quilting magazine Issue #21 designed by Susan Standen at Canadian Abroad.


Originally published as a 14.5" block to use on a quilt block folder project, I chose this one to enlarge to 30" because of the 5x5 grid construction.  5 blocks x 6" each = 30".  Yay!  

After drafting the larger size and including my color scheme, I figured the component sizes I'd need.  This is one of my most favorite parts of the quilting process - the quilt math!  Does anyone know if this block pattern has a name?  I didn't find one in the magazine's instructions.


The other two blocks I have to show you are from the original published Modern Building Blocks Pattern.  They both have super interesting names - here's Block 2 finishing at 36" square...


And Block 3 finishing at 30" square...

4 blocks down, 48 to go!

If you're planing to make this quilt I'm including some cutting and construction modifications I've used that seem to make the blocks more accurate and easier to cut and sew.

** Please note that I am not providing all the instructions here for making these blocks; you'll need your own copy of the pattern for a complete set of instructions to sew along.  I'm only providing information about how I modified the cutting and construction steps to make the blocks easier to sew and more accurate :)

Block 2 pattern cutting modifications
  1. A fabric: cut (7) 7.5" squares
  2. B fabric: cut (7) 7.5" squares
  3. C fabric: cut (10) 7.5" squares
  4. D fabric: cut (1) 20.5" squares
Block 2 construction modifications
  1. Make (10) A/C and (10) C/B HST units trimming all to 6 7/8'.  Combine these to make (10) C/B/A/C flying geese units pressing the center seam open.
  2. Make (4) B/A triangle units pressing the center seam open.
Block 3 pattern cutting modifications - 93 pieces!!
  1. Cut fabrics A, B, H, and I as directed
  2. C fabric: cut (10) 3.5" squares
  3. D fabric: cut (6) 3.5" squares
  4. E fabric: cut (2) 6.5" squares
  5. F fabric: cut (12) 6" squares
  6. G fabric: cut (8) 6" squares
Block 3 construction modifications
  1. Make (4) flying geese units with B and C.  Trim to 3" x 5.5"
  2. Make (16) F/G HST units.  Press (12) to F and (4) to G.  Trim to 5.5" square.
  3. Make (4) HST using D and C.  Press to D and trim to 3".
  4. Center 9-patch should measure 10.5" square unfinished.
  5. Corner H/I units should measure 10.5" square unfinished.

Wednesday, March 30, 2016

the biggest quilt block ever

Almost one year ago I started a Block of the Month program at a local quilt shop using the Moda Modern Building Blocks pattern.  The 84" x 96" quilt in the published pattern is made of 48 different blocks ranging in size from 6" to 36" using 21 unique Moda solid fabrics.


I chose a color palette of red, white/cream, grey, and icy blue that qualifies as Christmas-y, but can still be used in all the winter months December through February.  But I need mine to be king sized.  Because who doesn't want a special holiday quilt for their bed?

Block #1 is the largest (36" finished) and that's where the BOM program started - go big right outta the gate!  My center red and white section on point finishes at 12" square; adding the blue triangles brings the block center to 18" square.  The four outer squares are 9" and the flying geese sections are 9" x 18".  I'm quite sure this is the biggest quilt block I've ever made!  (If you're making this quilt too and would like some helpful cutting info, make sure you read all the way to the bottom of this post.)


The background here is a long-hoarded Paris street map print from the "Passport" line by 3 Sisters for Moda.  I'm planning to make this a very scrappy quilt with many different prints in my four main colors, but I'll use this Paris map print in lots of blocks because I love it so much :)  

My planning for a king sized quilt started with graph paper and scale cut cardstock pieces.  I used a 12:1 scale for cutting the cardstock, so the 36" block above is represented by a 3" square of cardstock.


Fortunately all of the block sizes in this quilt pattern are divisible by 3, so I assigned each square on my graph paper chart to be equivalent to 3" in real life.  By slightly upsizing a standard king sized quilt measurement to 96" x 108", both the height and width dimensions of my planned quilt are divisible by 3.  Whew - first step of quilt math done!


With the 96" x 108" grid marked on my graph paper, I started filling it with cardstock pieces to determine a layout.  After several iterations (and advice from a design-savvy friend) I arrived at this final layout.

My king-sized version of the Modern Building Blocks quilt will contain:
  • (2) 36" blocks
  • (2) 30" blocks
  • (2) 24" blocks
  • (5) 18" blocks
  • (16) 12" blocks
  • (25) 6" blocks
That's a total of 52 blocks!  I've been plugging away at this little by little over the past 12 months, but if I have any hope of draping this quilt over my bed in the Christmas/Winter season of 2016-17 I need to buckle down and finish the top soon.  I've got 23 blocks sewn so far, which I'll show you in posts to come.  While most of my blocks are from the published pattern, there are also a few designs that I pulled from other sources.

The following modifications and tips helped me get the correct sized block the first time.  I hope you'll follow along with my progress :)

Pattern cutting modifications for Block 1 - These changes allow you to trim sections to size as you sew which leads to better accuracy.
  1. B fabric: cut (8) 4" squares
  2. D fabric: cut (2) 4" squares
  3. E fabric: cut (2) 10.5" squares
  4. F fabric: cut (4) 10" squares
Block section trimming instructions - trim individual sections as you go to make sure you end up with a 36.5" unfinished block.
  1. Center square A/B trim to 6.5"
  2. B/D HST units trim to 3.5"
  3. C/D flying geese units trim to 3.5" x 6.5"
  4. A/B/C/D unit trim to 12.5"
  5. A/B/C/D/E unit trim to 18.5"
  6. F/G flying geese units trim to 9.5" x 18.5"

Monday, January 19, 2015

first finish of the year

2015 is going to be the year of finishing UFOs (unfinished objects) and WIPs (works in progress) here at elsie's girl! Since I am great at starting new projects, but not so great at finishing them, I've got quite a (literal) pile-up of projects in various stages of completion taking up space in the sewing room.

Riding the wave of post-Christmas holiday cheer I decided to tackle these two Christmas pillows first and finished them last week. The unquilted pillow tops had been stuck in the UFO pile since December 2012.


My quilt guild (Crystal Lake MQG) is hosting a 2015 UFO Challenge with prize drawings for completed projects throughout the year, and I've registered six UFOs so far. I could register sooo many more, but I'm really trying to be realistic about what I can actually finish before October and not fail miserably at this challenge!  These two pillows are my first UFO Challenge finish, so I'm off to a good start :)


But back to the pillows. The first one was made from a Jaybird Quilts pattern "Candy Dish" and measures 20" square.  The pattern actually makes a 16" square pillow, but it was easy enough to add extra rows and columns to make the 20" covering. All the blocks were cut from leftover fabric from the "It's the Hap-Happiest Season of All" quilt made in 2011 (the back of that very quilt is seen in this photo!)


It is simply straight line quilted with a pale robin's egg blue thread, and as I write this I see that I missed a row of quilting on the right edges of the two red blocks in the center of the photo. Oh well, finished is better than perfect, right?!


My second pillow was patterned after this sweet one from Amy at Nana Company. She designs and makes the loveliest projects :) Mine measures 16" x 26" and is also made with scraps from the same 2011 Christmas quilt.


I added straight line quilting in the same pale blue thread here within the colored fabric blocks, while hand embroidery of the lyrics from my favorite Christmas song fills in the white strips.


It's been a long time since I did this embroidery so I'm not sure what specific DMC floss color I used, but I believe it's only one or two strands in a stem stitch. I can only manage two embroidery stitches - stem and french knot - and those are the only stitches you see here! I seem to remember using more strands of floss for a bit and then taking it out because the stitching was too bulky. So don't be afraid to rip out and start over if you don't like the results. Embroidery is slow work for me, but I'm so glad I stuck with it long enough to finish these lyrics - to me they are the best part of the pillow!


Both pillows have zipper backings. The square one is made from a couple of flannel pieces I had saved from the 2011 Christmas quilt (the front seen here) and has a standard 18" centered zipper insertion.


Because I had a larger piece of this backing fabric, I was able to add a hidden 14" standard zipper very near one of the short ends. I always use this tutorial from House on Hill Road for hidden zipper pillow backings.


One of the requirements of the guild UFO challenge is that when you finish a project it must be shown at the next guild meeting to be eligible for the prize drawings. So I'll be taking these to our February meeting and then packing them away until Thanksgiving weekend much later this year. Chances are excellent that I'll forget all about these pillows until then, and it will truly be like Christmas when we decorate again in late November and I rediscover them!

One UFO down, five to go!

Tuesday, January 6, 2015

Christmas gift sewing part 3

Much of my November and December sewing time was spent making these wonderful little zippered bags. The pattern is "Sew Together Bag" by Sew Demented and you can order printed copies of the pattern from a handful of shops on etsy.com or download a PDF version from craftsy.com.


This bag pattern is not a quick sew and not for the faint-hearted, but if you can put aside your fear of zippers (each bag has four of them!) and devote a few hours to sewing the first one, each additional bag will go much faster. Each finished bag measures approximately 10" x 5" x 5".

There is a great online sew-along for this pattern complete with lots of extra photos and tips here.  I used these sew along instructions in conjunction with the pattern each time I made a bag, and found them to be a tremendous help - my first bag tuned out just as fabulous as my fifth!

The first bag was made as a November birthday gift for my sewing and traveling buddy, Kelly.


I used a variety of black and white prints, some with a sewing theme.  All the cut pockets, lining pieces, bag exterior, and binding pieces are shown here.


A view of the bag interior before sewing the outer zipper.  There are three internal pockets with contrasting linings and individual zippers.  I used different colored zippers and linings for each pocket in all of the bags.


This is a view of the interior after adding the external zipper and bindings.  It still opens very wide to accommodate and leave visible all the goodies you pack inside.


The second bag was for another sewing buddy and fellow Crystal Lake Modern Quilt Guild (CLMQG) Executive Board member, Lorrie.  More sewing themed prints, this time from the "Sew Stitchy" line by Aneela Hoey for Moda.


The blue version is still in residence at my house.  I haven't yet decided where it will end up :)


CLMQG Secretary Jill received this red, white, and turquoise version.


She's a fellow Paris lover whose favorite color is red, so I had to make her bag with this great fleur de lis print!


The external zipper and binding make a "handle" of sorts on each end of the closed bags.


And lastly this black and white beauty was made for Judy, our CLMQG Treasurer.  More scissors fabric, but this time on the bag exterior.


I probably couldn't get those stripes on the binding to match up again if I tried.  What a lucky accident!


I forgot to take a photo of the final touch on each bag - I added a letter "first initial" charm to each external zipper pull for personalization.  JoAnn's has some really cute charms in their beading section that are the perfect size - about 3/4" square.

This is the final installment of Christmas gift projects from 2014 that I have to share with you.  I believe I did more gift sewing in 2014 than any other previous year.  It was so much fun to sew all these individual, personalized gifts and even more fun to give them away and see how much the recipients enjoyed their surprises!

I've declared 2015 the year of finishing projects.  My guild is introducing a UFO Challenge at our meeting this weekend, and I've already got a list of 5 projects to register!  I could register soooo many more, but I'll start with the ones that I've got a decent chance of finishing.  More about those later...

Happy New Year!!  May it be a year filled with learning, sewing successes, and project finishes for all of us!

Monday, November 4, 2013

snowflake pillows finished

The holiday snowflake pillows are completed and on display at my LQS. Here's a shot of the two pillow fronts and the little info cards I made to attach to each one.


The pattern called for the pillow backs to be closed with seven buttons. While I loved the look of the buttons in the pattern book photos, I didn't think that a button closure was the best option for a few reasons:
  1. that's a lot of buttonholes to sew
  2. all my buttons were different sizes so I'd need to recalibrate the buttonhole attachment frequently
  3. I didn't want the pillow backs to look like when a guy wears a too-tight shirt and the buttons are just barely keep everything contained


So I put a zipper under the buttonhole flap instead!


Now the backs are all smooth and pretty with just five decorative buttons each.


You can read more about the construction of these pillows here. The pattern I used can be found in Amanda Murphy's new book, Modern Holiday.

Tuesday, October 29, 2013

snowflake applique pillows

I've found some Christmas spirit and started working on a couple of Christmas pillows for display at my LQS, Material Girl in Crystal Lake, IL.


The pattern I used is called "Snowflake Pillows", and it can be found in the new book, Modern Holiday by Amanda Murphy. This book is full of fun quilted projects you can make to decorate your home during the holiday season. I want to make all of the pillow patterns, as well as most of the quilts. You should definitely check out this book!


I traced the four unique snowflake patterns from the book onto Heat n Bond Lite, then fused them first to a Basic Grey Grunge fabric in white. I trimmed around the snowflake shapes and then fused then to my pillow fronts - four different snowflakes per pillow. Tiny zigzag stitches in matching thread cover the raw edges of the applique pieces and protect them from fraying.

Both of my pillows are made using the 2013 Basic Grey holiday line called "Aspen Frost". The first has a blue Grunge accent with nutcrackers and tree ornaments...


While the second pillow has a green Grunge accent with poinsettia flowers and pine needles. The buttons are for the pillow backs - I have quite a few mismatched deep red buttons of varying sizes from 3/4" to 1" that I plan to use to give each pillow a unique look, rather than purchasing new buttons that all match.


Each snowflake is centered on a 4.5" finished square, and the finished pillow will hold a 12" x 16" insert.


I quilted the green trimmed pillow with horizontal wavy lines on both the trim and main body pieces. The snowflake squares are not quilted because I appliqued through all the pillow front layers - pillow top, pre-washed flannel, and muslin backing.


The blue trimmed pillow is quilted with swirls - my favorite! - on the trim and main body pieces.


I'll show you the backings and completed pillows soon. I'm anxious to finish these and get them to the shop for display!

Tuesday, January 8, 2013

Happy 2013!

I'm a little late to the party wishing you all a Happy New Year, but better late than never, right?!

I managed to squeak out a few finishes at the very end of 2012 - and I do mean the very end. As in December 31!

This Sunburst Baby quilt had been quilted with an all-over stipple pattern...


And the binding was machine-attached in mid-December...


But the label wasn't attached until New Year's Eve. It's now been delivered to the family, and hopefully they are enjoying it :)


This sweet pink and yellow jelly-roll baby quilt is headed to a local hospital NICU unit with lots of other baby quilts made by my sewing group at church.


Love that sweet polka dot binding...


And last but not least, true to my usual habit of finishing a holiday project within days of the holiday, my little button tree was framed just long enough to sit on the hearth for a photo. It's now packed away, and I'll likely forget about it until late November this year when we haul all the decorations up again. I'll open the box, unwrap it, and say something like, "oh how lovely! I'm so glad I finished it!"


I'd like to say that I resolve to finish more of what I start this year, but that's just not me. I do resolve to finish items with a deadline first, but then I'm just going to work on whatever makes me happy at the moment, and if it gets finished, great! But the whole point should be to have fun, shouldn't it?

Here's to a healthy, happy, and FUN 2013!!

Thursday, December 13, 2012

happy holiday button trees

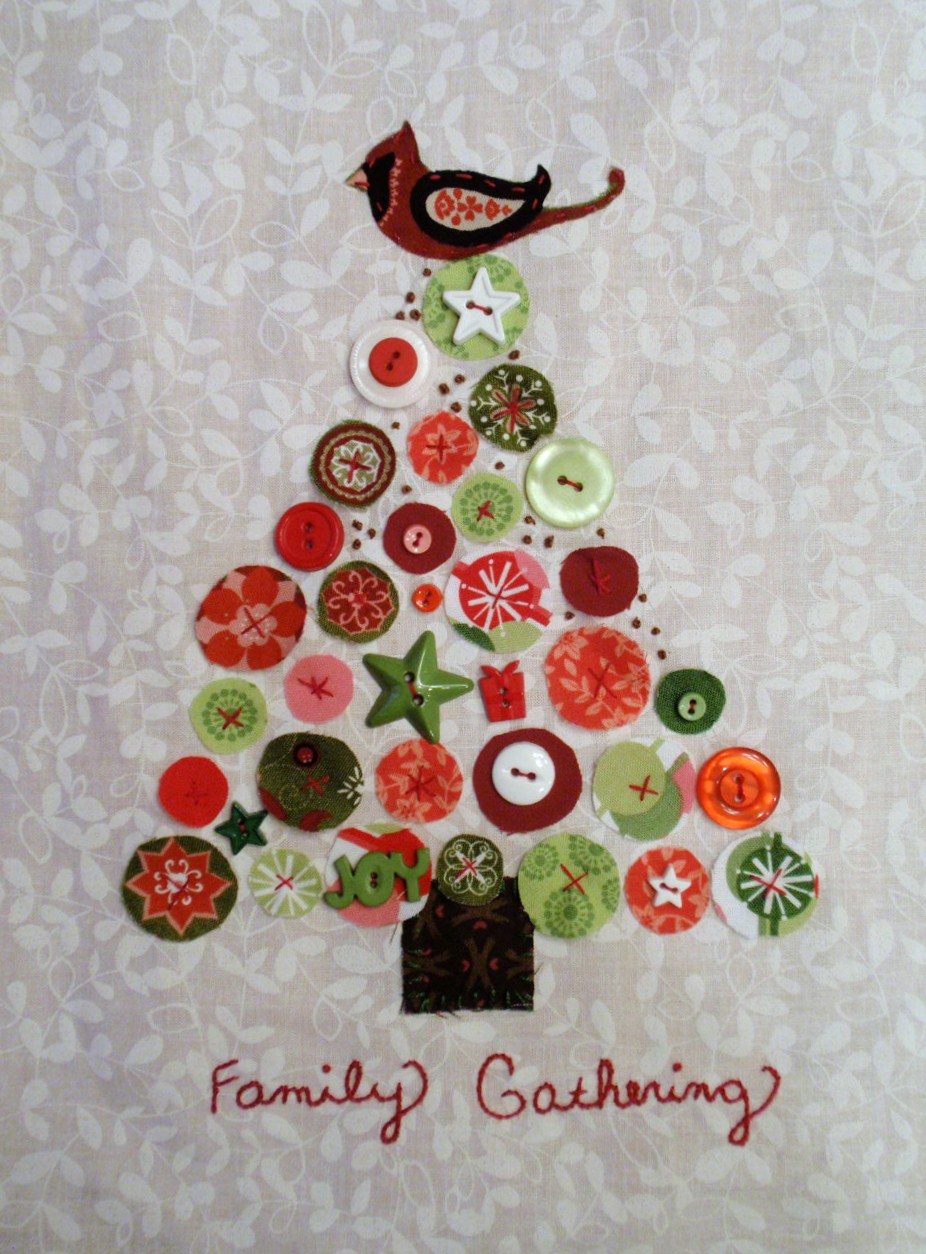
I had some girlfriends over this past weekend for a little crafting party, and take a look at this cute project we worked on - Christmas Button Trees! They were so easy and fun to make. All you need are some holiday fabric scraps, buttons, and embroidery floss to make your very own.

Here's mine all stitched and ready to be framed...


This was our prototype that Lorrie completed last year and gave to a good friend. The pattern comes from a 2011 Better Homes and Gardens magazine called "Holiday Crafts", and the finished tree fits in a frame with an 8" x 10" opening. Lorrie purchased a white frame from a local craft store and painted and distressed it to showcase her beautiful work.


We each put our own personality into our individual projects, and they all turned out beautiful! Here is Wendy's glammed-up tree on a dramatic black print background...


Kelly's traditional red and green tree - she put a bird on it! And she chose a different embroidered message to personalize it even more...


Andrea's whimsical snowman-topped tree...


And Paige's red batik tree complete with bling and garland!


Lorrie also made a new tree to keep for herself this year - can you believe all those buttons?! I love her "Swell Noel" embroidery!


Here we are hard at work at my kitchen table...


Dixie is under the table hoping for dropped food, but she only got stray buttons and fabric scraps!


The mess necessary for creativity...


Of course we had to partake in some festive holiday beverages! These pretty drinks are Poinsettias - roughly equal parts Prosecco and cranberry juice - a little bit of pink bubbly cheer...


An hors d'oeuvres potluck to keep us sustained during our hours of crafting...


And the best for last - a delicious red velvet cake from Lorrie...


Such fun to spend a December weekend day with these great girls! I hope you are all able to spend some time with friends during this busy time of year :)

LinkWithin

Related Posts Plugin for WordPress, Blogger...