Pages

Showing posts with label zipper. Show all posts

Monday, February 15, 2016

valentine pillows

Every year after the Christmas holiday is over and all the decorations are packed away, I find myself in the same spot - no seasonally appropriate pretty pillows to replace the Christmas ones.


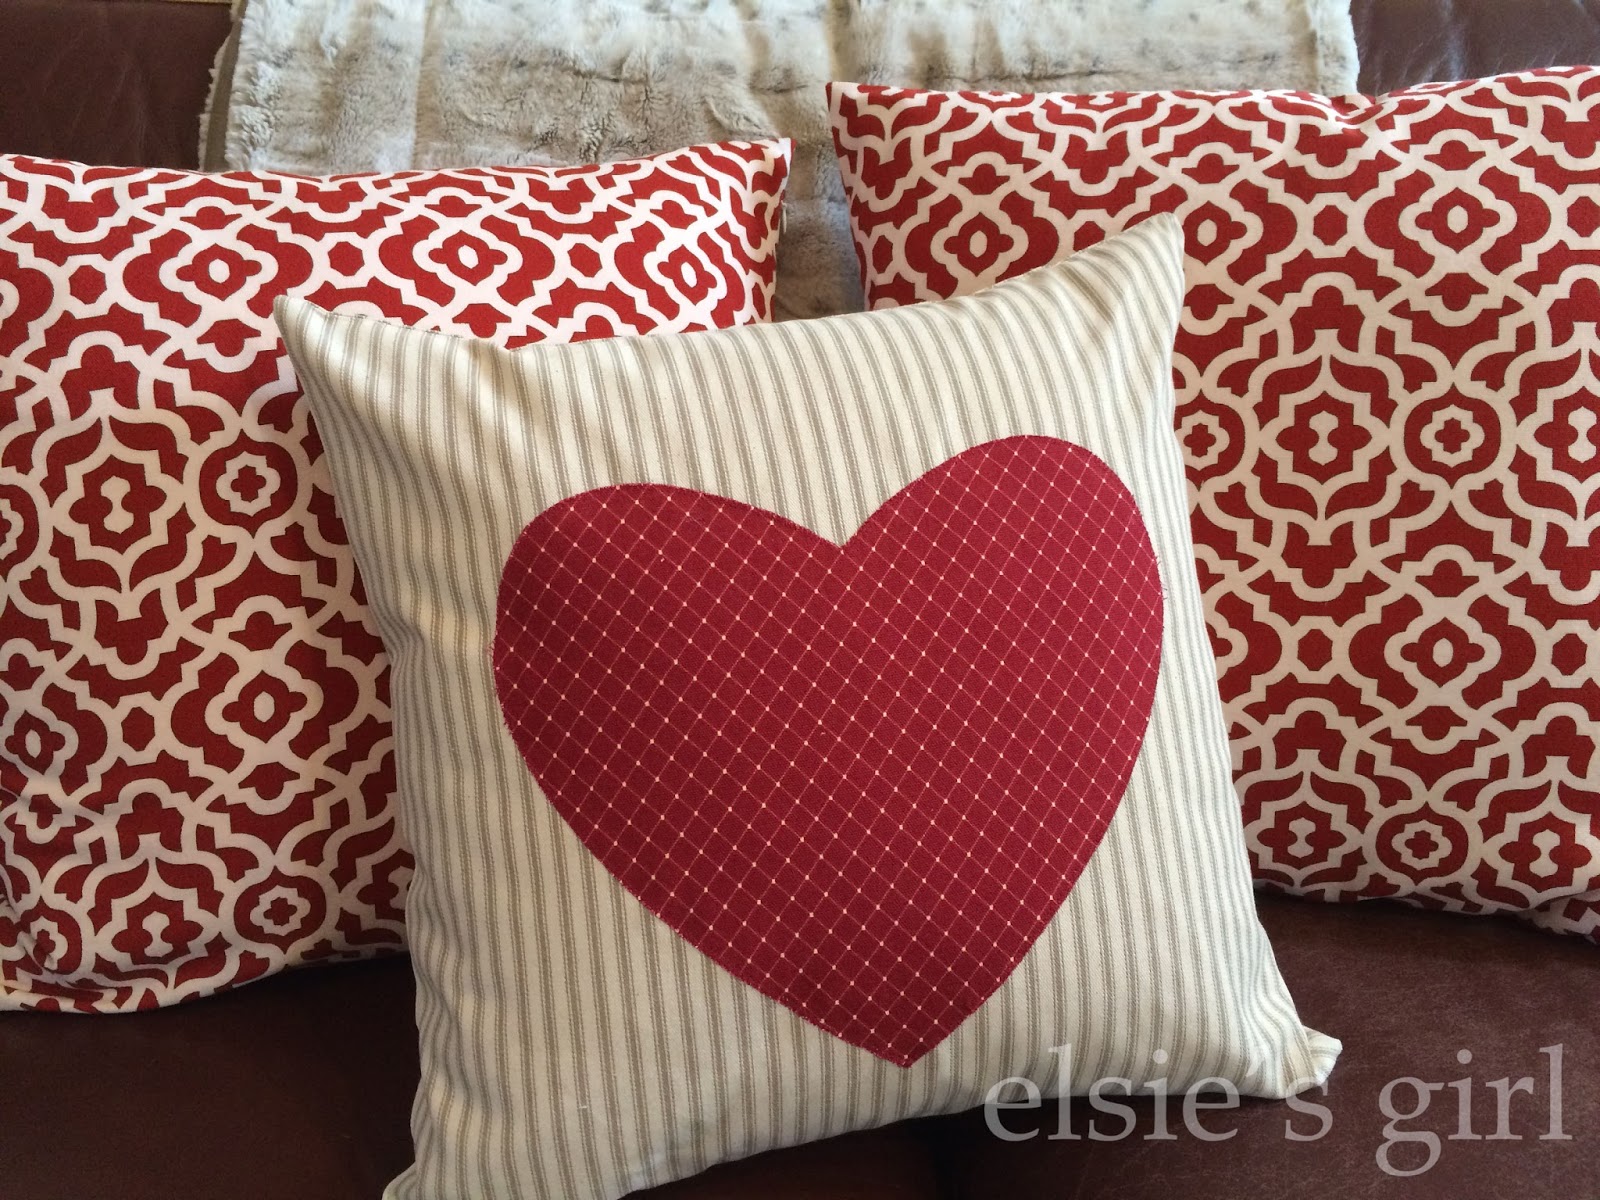
Last week I finally remedied that problem by whipping up these three fun pillows using home dec weight fabric purchased at WalMart...WalMart!!

I'm not a big fan of that particular retail company, but when I saw Jona Giammalva's recent Periscope about her fabric score at her local superstore, I decided to give it a try.  My local store had this great red geometric print for $3.97 per yard. What?!  And the ticking stripe was $6.97 per yard!

A couple of yards of fabric, three zippers, and two hours of cutting and sewing later, I had three great new pillows for my family room :)


Jona's recent blog post about her new heart applique pillow will give you all the tips and tricks for making your own, and she has a great tutorial on how to insert an invisible zipper into the side seam of your pillow covers.  Check it out - it's easy and foolproof!


The red pillows are 20" square, and the heart pillow is 18" square.  Seriously, this project could not have been any easier. 


Thanks for the terrific tips and tutorials, Jona!!

Monday, January 19, 2015

first finish of the year

2015 is going to be the year of finishing UFOs (unfinished objects) and WIPs (works in progress) here at elsie's girl! Since I am great at starting new projects, but not so great at finishing them, I've got quite a (literal) pile-up of projects in various stages of completion taking up space in the sewing room.

Riding the wave of post-Christmas holiday cheer I decided to tackle these two Christmas pillows first and finished them last week. The unquilted pillow tops had been stuck in the UFO pile since December 2012.


My quilt guild (Crystal Lake MQG) is hosting a 2015 UFO Challenge with prize drawings for completed projects throughout the year, and I've registered six UFOs so far. I could register sooo many more, but I'm really trying to be realistic about what I can actually finish before October and not fail miserably at this challenge!  These two pillows are my first UFO Challenge finish, so I'm off to a good start :)


But back to the pillows. The first one was made from a Jaybird Quilts pattern "Candy Dish" and measures 20" square.  The pattern actually makes a 16" square pillow, but it was easy enough to add extra rows and columns to make the 20" covering. All the blocks were cut from leftover fabric from the "It's the Hap-Happiest Season of All" quilt made in 2011 (the back of that very quilt is seen in this photo!)


It is simply straight line quilted with a pale robin's egg blue thread, and as I write this I see that I missed a row of quilting on the right edges of the two red blocks in the center of the photo. Oh well, finished is better than perfect, right?!


My second pillow was patterned after this sweet one from Amy at Nana Company. She designs and makes the loveliest projects :) Mine measures 16" x 26" and is also made with scraps from the same 2011 Christmas quilt.


I added straight line quilting in the same pale blue thread here within the colored fabric blocks, while hand embroidery of the lyrics from my favorite Christmas song fills in the white strips.


It's been a long time since I did this embroidery so I'm not sure what specific DMC floss color I used, but I believe it's only one or two strands in a stem stitch. I can only manage two embroidery stitches - stem and french knot - and those are the only stitches you see here! I seem to remember using more strands of floss for a bit and then taking it out because the stitching was too bulky. So don't be afraid to rip out and start over if you don't like the results. Embroidery is slow work for me, but I'm so glad I stuck with it long enough to finish these lyrics - to me they are the best part of the pillow!


Both pillows have zipper backings. The square one is made from a couple of flannel pieces I had saved from the 2011 Christmas quilt (the front seen here) and has a standard 18" centered zipper insertion.


Because I had a larger piece of this backing fabric, I was able to add a hidden 14" standard zipper very near one of the short ends. I always use this tutorial from House on Hill Road for hidden zipper pillow backings.


One of the requirements of the guild UFO challenge is that when you finish a project it must be shown at the next guild meeting to be eligible for the prize drawings. So I'll be taking these to our February meeting and then packing them away until Thanksgiving weekend much later this year. Chances are excellent that I'll forget all about these pillows until then, and it will truly be like Christmas when we decorate again in late November and I rediscover them!

One UFO down, five to go!

Tuesday, January 6, 2015

Christmas gift sewing part 3

Much of my November and December sewing time was spent making these wonderful little zippered bags. The pattern is "Sew Together Bag" by Sew Demented and you can order printed copies of the pattern from a handful of shops on etsy.com or download a PDF version from craftsy.com.


This bag pattern is not a quick sew and not for the faint-hearted, but if you can put aside your fear of zippers (each bag has four of them!) and devote a few hours to sewing the first one, each additional bag will go much faster. Each finished bag measures approximately 10" x 5" x 5".

There is a great online sew-along for this pattern complete with lots of extra photos and tips here.  I used these sew along instructions in conjunction with the pattern each time I made a bag, and found them to be a tremendous help - my first bag tuned out just as fabulous as my fifth!

The first bag was made as a November birthday gift for my sewing and traveling buddy, Kelly.


I used a variety of black and white prints, some with a sewing theme.  All the cut pockets, lining pieces, bag exterior, and binding pieces are shown here.


A view of the bag interior before sewing the outer zipper.  There are three internal pockets with contrasting linings and individual zippers.  I used different colored zippers and linings for each pocket in all of the bags.


This is a view of the interior after adding the external zipper and bindings.  It still opens very wide to accommodate and leave visible all the goodies you pack inside.


The second bag was for another sewing buddy and fellow Crystal Lake Modern Quilt Guild (CLMQG) Executive Board member, Lorrie.  More sewing themed prints, this time from the "Sew Stitchy" line by Aneela Hoey for Moda.


The blue version is still in residence at my house.  I haven't yet decided where it will end up :)


CLMQG Secretary Jill received this red, white, and turquoise version.


She's a fellow Paris lover whose favorite color is red, so I had to make her bag with this great fleur de lis print!


The external zipper and binding make a "handle" of sorts on each end of the closed bags.


And lastly this black and white beauty was made for Judy, our CLMQG Treasurer.  More scissors fabric, but this time on the bag exterior.


I probably couldn't get those stripes on the binding to match up again if I tried.  What a lucky accident!


I forgot to take a photo of the final touch on each bag - I added a letter "first initial" charm to each external zipper pull for personalization.  JoAnn's has some really cute charms in their beading section that are the perfect size - about 3/4" square.

This is the final installment of Christmas gift projects from 2014 that I have to share with you.  I believe I did more gift sewing in 2014 than any other previous year.  It was so much fun to sew all these individual, personalized gifts and even more fun to give them away and see how much the recipients enjoyed their surprises!

I've declared 2015 the year of finishing projects.  My guild is introducing a UFO Challenge at our meeting this weekend, and I've already got a list of 5 projects to register!  I could register soooo many more, but I'll start with the ones that I've got a decent chance of finishing.  More about those later...

Happy New Year!!  May it be a year filled with learning, sewing successes, and project finishes for all of us!

Friday, September 19, 2014

college apartment pillows - part 2

I'm finally back to finish reporting on the college apartment pillows that I helped Thing 1 make last month.  The round pillow was made using an Amy Butler pattern, and you can read more details about the construction of that one here.  But today I want to tell you about the other four pillows we made.  I did most of the cutting, and Thing 1 did ALL of the sewing.


The two square pillows were sewn with home dec weight fabric we found at JoAnns.  Each of these 27" floor pillows has a beige hemp piping/welting trim around its outer edge.  The inserted pillow forms have a box edge instead of the usual knife edge, so the covers are well stuffed - just the way you want a floor pillow!


They also have concealed zipper flaps on the back to hide the zippers and prevent scratching either the floors or people sitting on them :)


In this photo you can see the standard 22" zipper beneath the flap.  I always use this tutorial for placing a lapped zipper on the back side of a pillow - it has several photos and excellent directions that guide you through the entire process.


The two lumbar pillows each measure 14" x 28" and are also made using a home dec weight fabric from JoAnns.  I liked this fabric so much that I bought extra yardage to re-cover the cushions on a rocking chair here at my own house!


Thing 1 decided to sew invisible zippers into the 14" ends of these two pillows.  She's a zipper pro!


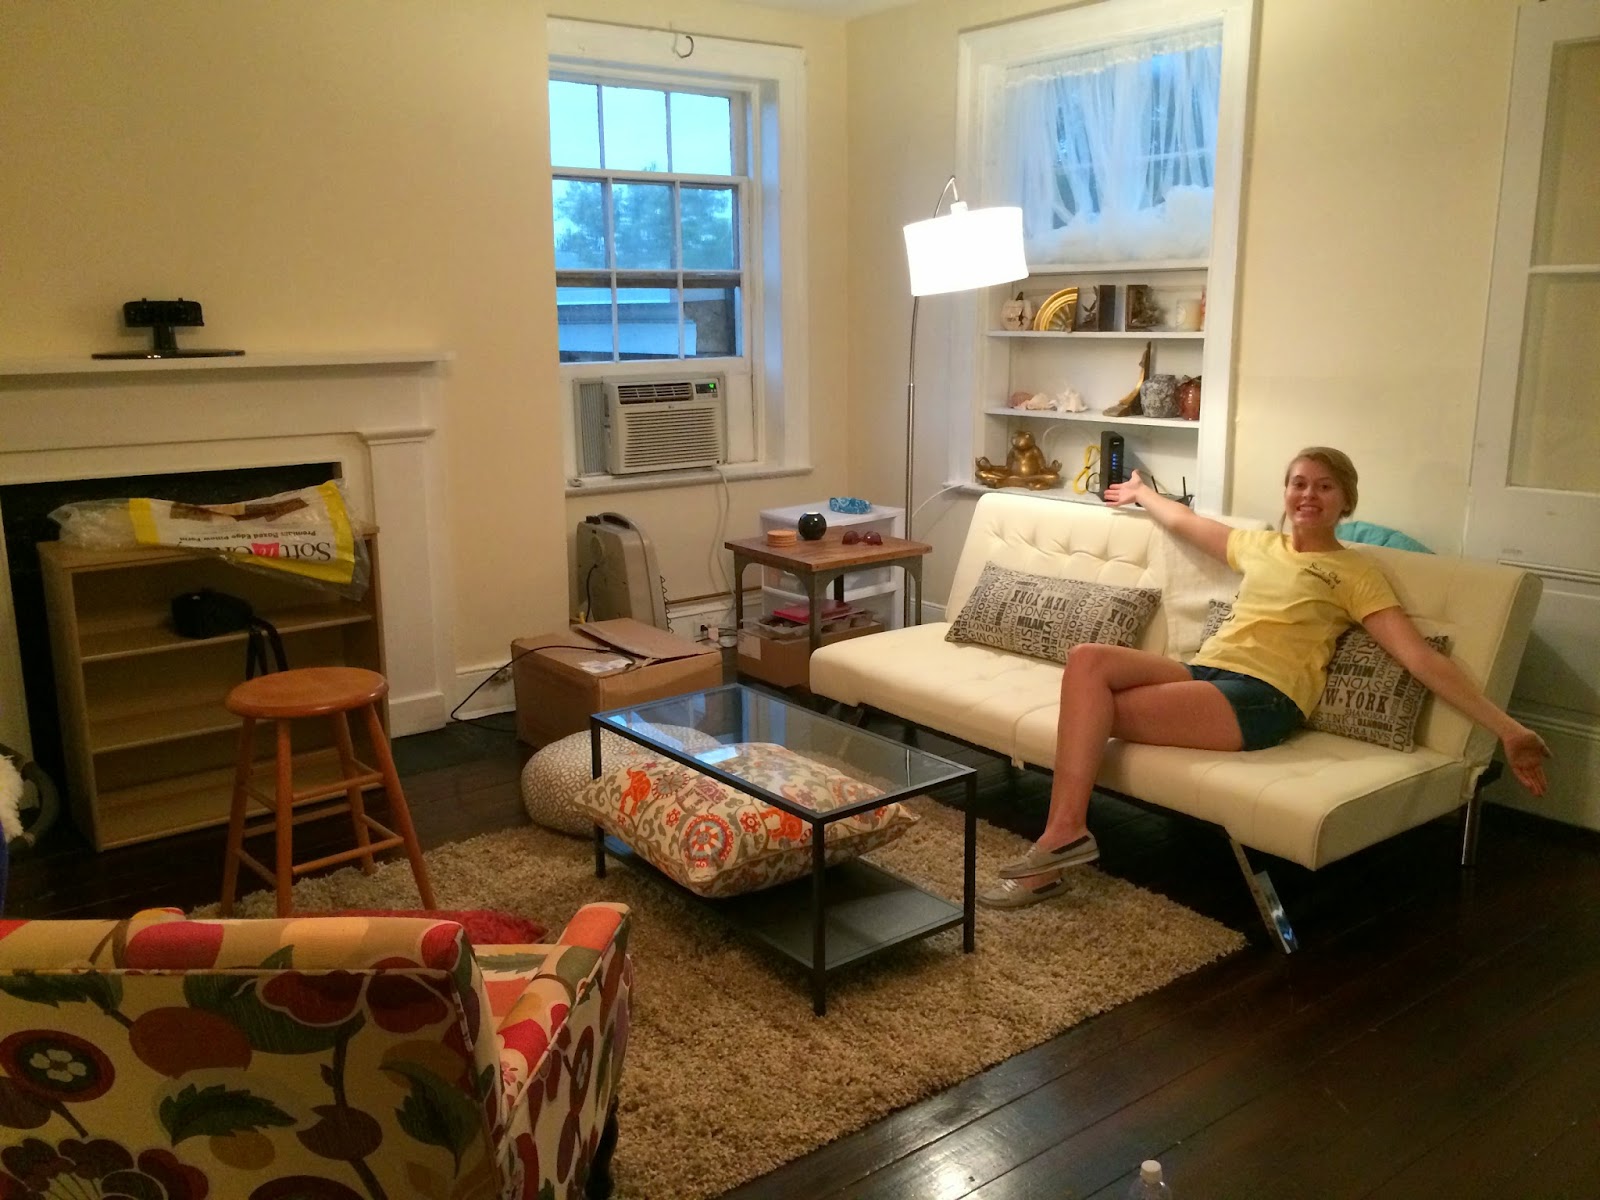
All of these gorgeous pillows are now decorating Thing 1's college apartment.  Needless to say it's a very stylish first apartment.  This photo was taken at the end of two days of non-stop painting and moving furniture.  A lot more decorating has happened since then, but you get the general idea.


Here we are outside the building which dates from 1850.  It's on an all brick street with brick sidewalks - very charming :)


Currently I have a cut of home dec weight fabric just waiting to be made into another HoneyBun Pouf pillow for a class sample.  It's on the top of the project pile so it stands a decent chance of completion before the year ends ;-)

Enjoy your weekend!

Friday, August 29, 2014

college apartment pillows

It's been a fun summer with little bits of sewing here and there, but last week was VERY productive! Thing 1 is preparing to move into her first apartment at college, and she needs some fun pillows to decorate her new space. She did most of the sewing, I did most of the cutting, and with a few days of  intense work she has three new seriously stylish floor pillows...


And two lumbar pillows for the couch/futon!


I'm going to dive right into the "how-to" for the most difficult pillow - the 24" round Honey Bun Pouf pillow made from Amy Butler's pattern in this fun geometric print we found in the Home Dec section at JoAnn's. The pattern calls for 2 1/8th yards of 54" decorator weight fabric for the 24" size, but even after careful fussy cutting to match the print I still have 3/4 yard leftover. That seems an excessive amount of extra fabric, but I guess that just means a few more toss pillows :)

The pattern also gives directions for constructing the pillow with quilting weight cottons, but you need to back each pillow segment with heavier weight cotton canvas to provide the required sturdiness and weight for a floor pillow. In my opinion the home dec weight was perfect - not too bulky to work with , one less construction step, and the finished product feels durable.


First step - trace the wedge template provided with the pattern. I made 5 pattern tracings on freezer paper so I could iron the patterns to the fabric for easy cutting without pinning. 30 total wedges are needed to make the pillow - yikes!


Mark your pattern pieces with information from the pattern. This is an OCD type habit that I have, but it has saved me from making cutting mistakes several times. The information also helps if your patterns get separated from the instructions, and you find them two years later and wonder "what the heck are these?!" Ask me how I know this ;) The center of the pattern outer edge is marked to help me with the fussy cutting.


Since this geometric print is a mirror image from left to right and top to bottom I was able to stagger the pattern pieces across the fabric this way. I could fit my 5 wedge patterns across 26" - half the width of this decorator fabric - so 10 would fit across one complete width selvage to selvage. If your fabric has no specific pattern you want to match in cutting, then you could cut two layers at a time. But since I wanted (needed!) to match the fabric pattern, I cut each wedge individually. And notice no pins! Freezer paper is fabulous for patterns like this!


Each wedge is backed with a layer of lightweight cotton batting, which means you need to cut 30 pieces of batting using the wedge pattern.  The pattern supply list includes a twin sized batting, but that seems an excessive amount.  I can't say for sure the actual quantity needed since I used my scraps, but it seems to me a throw size (60" square) for the 24" pillow will be sufficient. The lightest weight cotton batting is what you want. Anything with more weight and bulk is going to give you problems sewing. Quilter's Dream Request batting (the blue label) is a good choice.


The batting is basted to each wedge section and then trimmed away to very near the basting stitches - by far the most tedious step of the process. The pillow top and bottom are sewn into three segments of five wedges with all seams pressed in the same direction. Here is one completed segment - 1/3 of the pillow top.


And here is the completed top. That fussy cutting was totally worth the extra time, right?!


The underside of the pillow top shows how the seams all spiral in the same direction. Loops of twill tape are sewn to the center of the top and bottom to achieve the tufting effect. I initially questioned the necessity of this step thinking I could just use a long upholstery needle to attach the buttons at the end after stuffing, but this method is genius.  Do it this way!


A 12" zipper provides the side seam opening for stuffing. Inserting this zipper was easy peasy. I was anticipating much more difficulty because of all the fabric bulk, but it went very smoothly.


Two self-covered 2.5" diameter buttons and 4 pounds of fiberfill stuffing completes the pillow.  None of the local sewing supply shops had this size button kit in stock so I ordered them from amazon.


The medallion motifs were fussy cut from fabric that we used on another pillow - they were the perfect size!


Since this is such a lengthy and photo-heavy post, I'm going to save the details about the other four pillows for the next post.

I hope you all have enjoyed your summer as much as I have - with the exception of the rotary cutter incident of course!  Here's to a great fall season.  Back to school and back to sewing!!

Are there any other Honey Bun Pouf pillow makers out there?

Wednesday, April 30, 2014

building a summer wardrobe one skirt at a time

Over the past month I've had the great privilege of teaching several ladies in my area how to fit and make their own skirts using the book The Essential A-Line by Jona Giammalva. (You can read my gushing reviews of the book in these previous posts.) To date I've taught two sessions on making the basic skirt and one session on sewing this pleated version...


That glasses fabric! So fun! I started sewing this skirt last fall and nearly had it completed, but then the weather turned so I put it aside. A couple of weeks ago I finished it and decided to make another to refresh my memory on how it was constructed, which yielded this summer fresh version using fabrics from Kate Spain's recent Daydream line for Moda (yep, that's a bathroom mirror selfie you're looking at)...


After sewing all these skirts it feels like I can put the zippers in with my eyes closed. I use a combination of a few different methods I've seen (one day I'll write a handy tutorial), and all of my students have been very pleased with how easy they are to insert.


My skirts on display at the LQS where I've been teaching...


And here is my fabric selection for the next skirt - a tiered version where the blue large floral print will be the main piece and the smaller floral print on white will be the bottom "layer" both separated and hemmed by the fuchsia solid.  The florals are from Iza Pearl's new line Garden Party Tango for Windham Fabrics.


It's possible that I might have enough skirts after that one is complete (possible but not likely!) so I'll be expanding my repertoire and wardrobe by making this Schoolhouse Tunic next...


New clothes for spring - what could be better?! Have you made any new clothing recently?

LinkWithin

Related Posts Plugin for WordPress, Blogger...